
A Circuit in FlightGear
I took these screenshots in FlightGear during two right-handed circuits on runway 22 at CYOW (I would have used only one, but I managed to crash FlightGear -- the program, not the plane -- during one of the screenshots on crosswind the first time through).
Often, when people have trouble controlling a plane in a PC simulator, it's because they're fixating on the panel and chasing the gauges. That's the wrong way to fly; here's the right way:
LOOK OUT THE WINDOW.
These pictures show how you can fly smoothly by concentrating on where the horizon hits the nose of the plane; in other words, by paying attention to the plane's attitude. You actual visual references for the horizon may change if you use a different pilot viewpoint or a different 3D model, but your first step should always be to learn the attitudes that work for the plane you're flying and then stick with them, cross-checking the airspeed indicator and altimeter no more often than you would check your rearview mirror in a car.
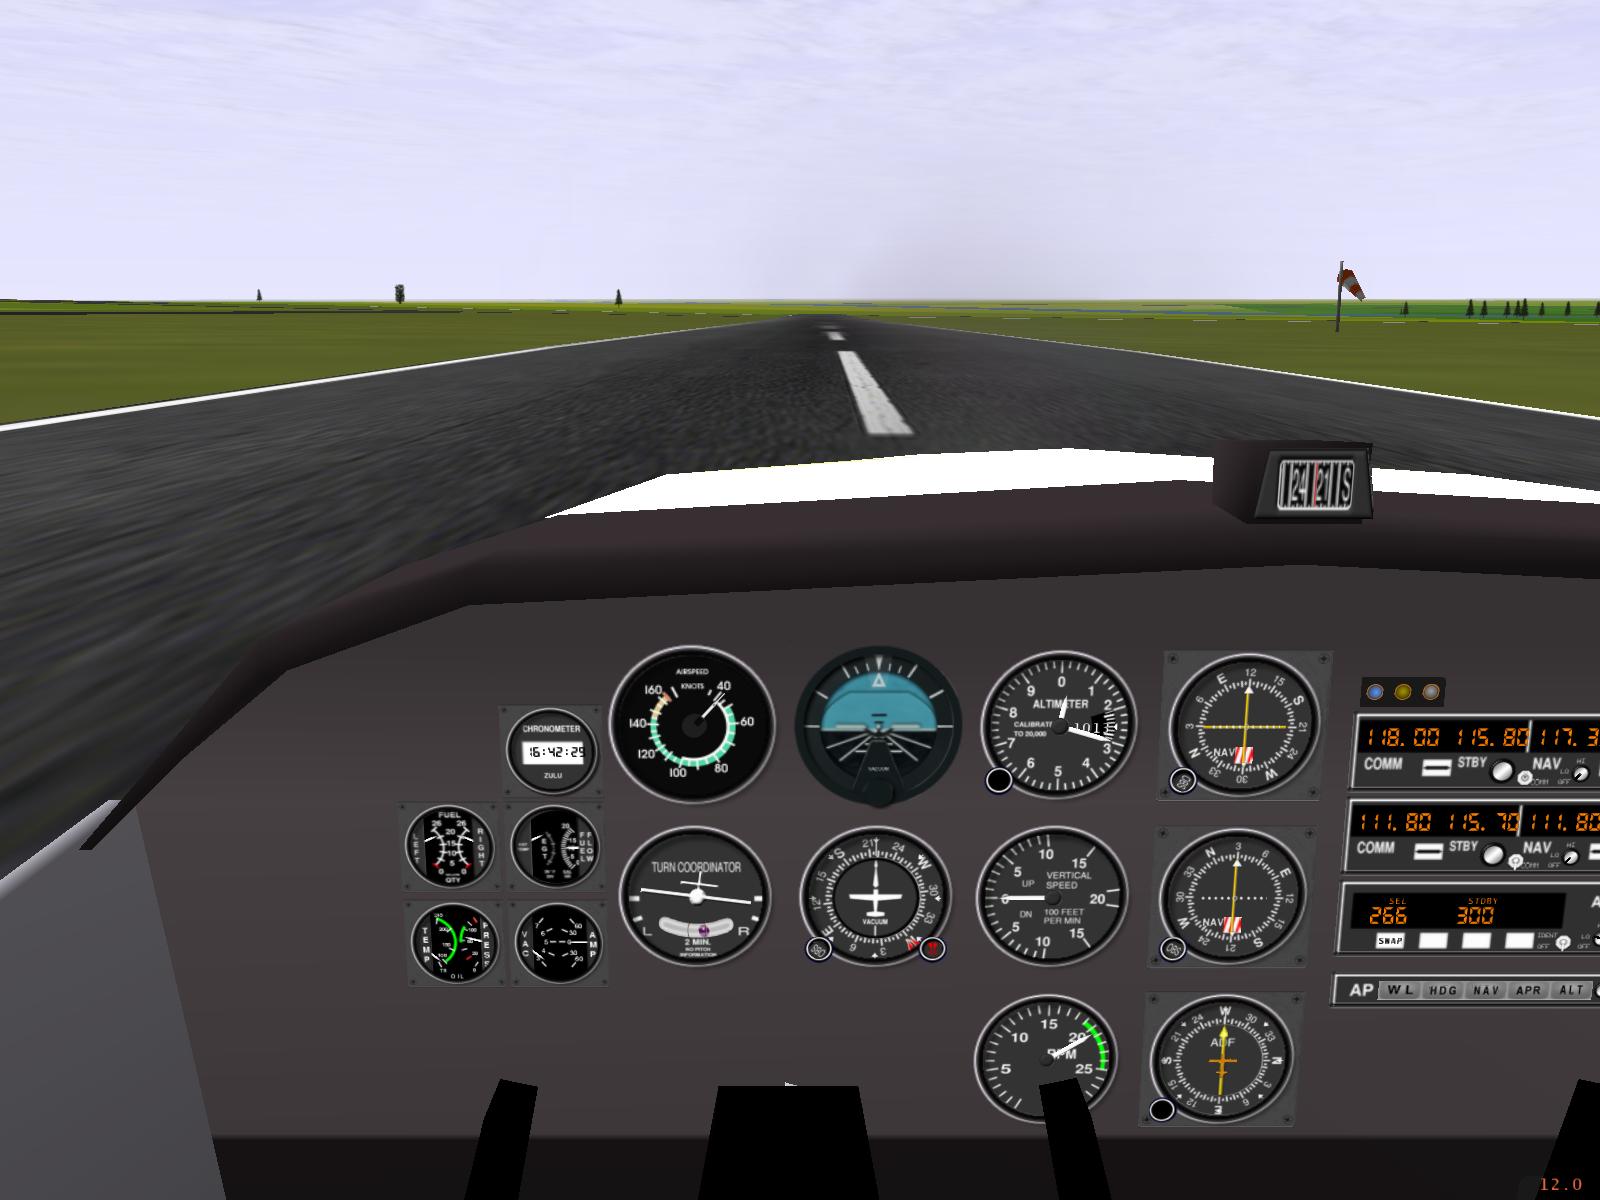
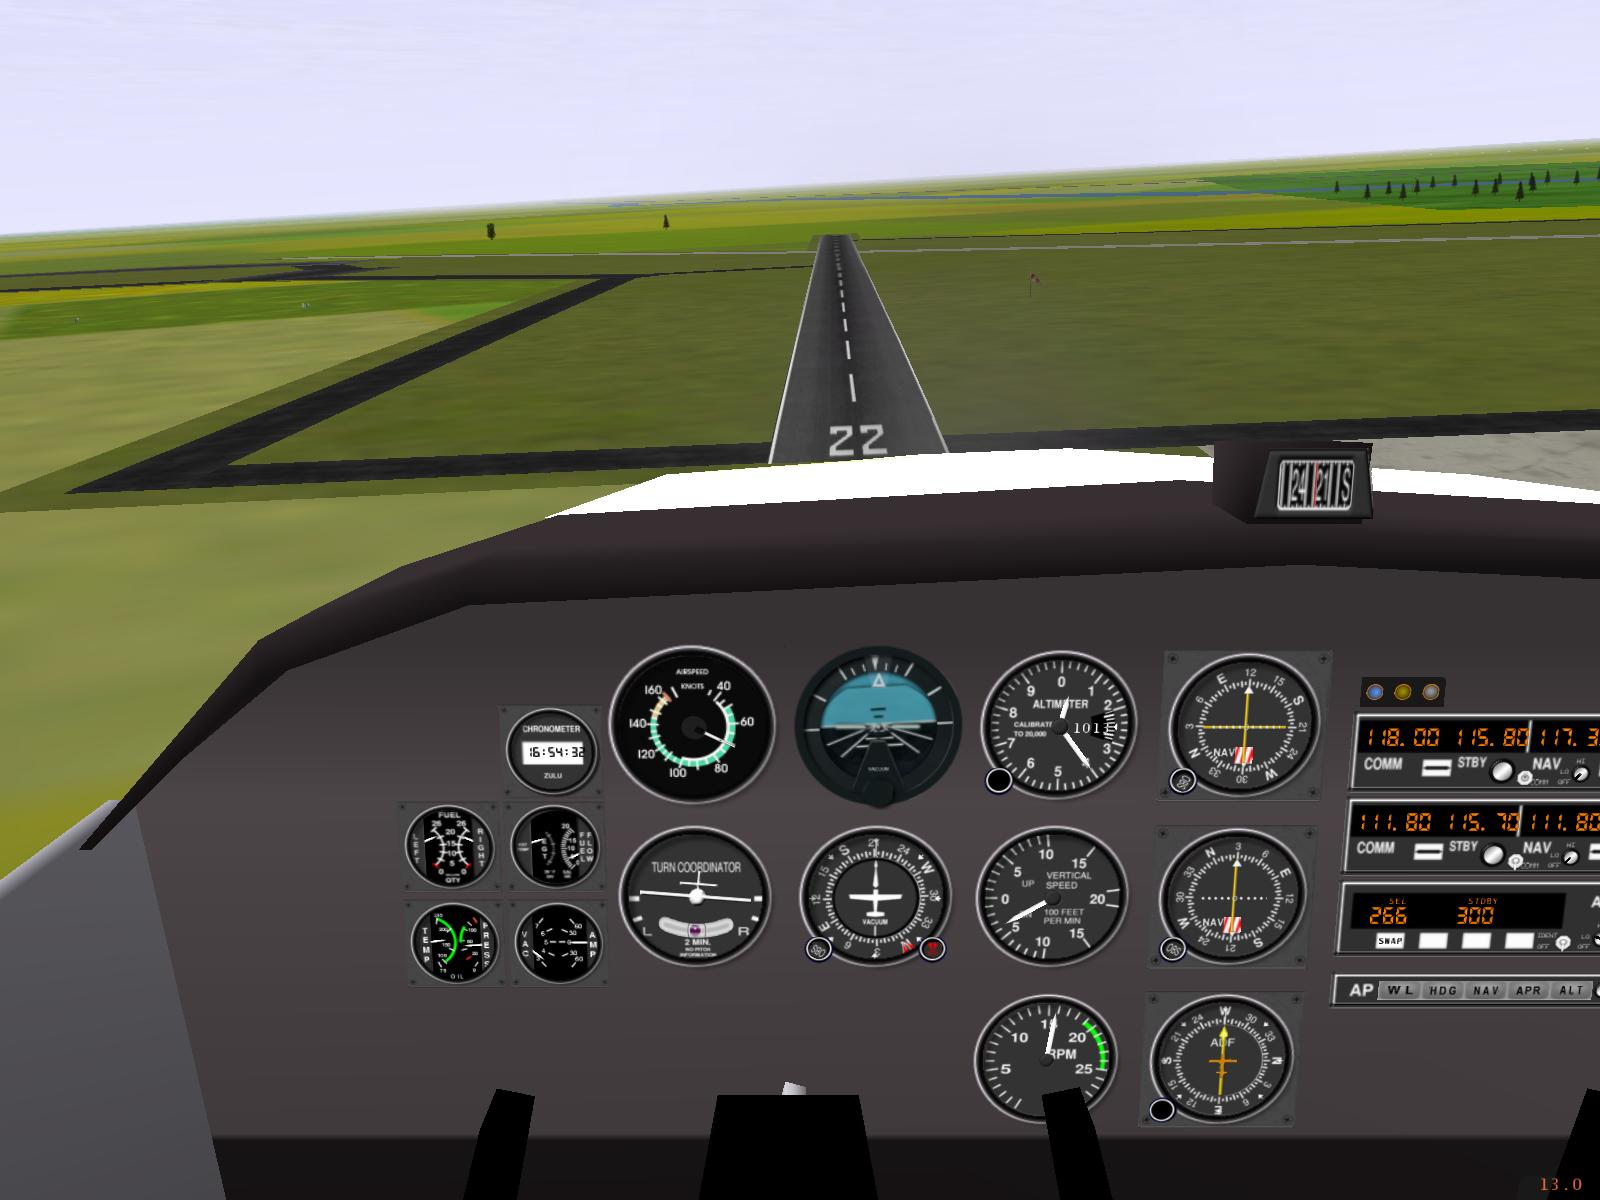
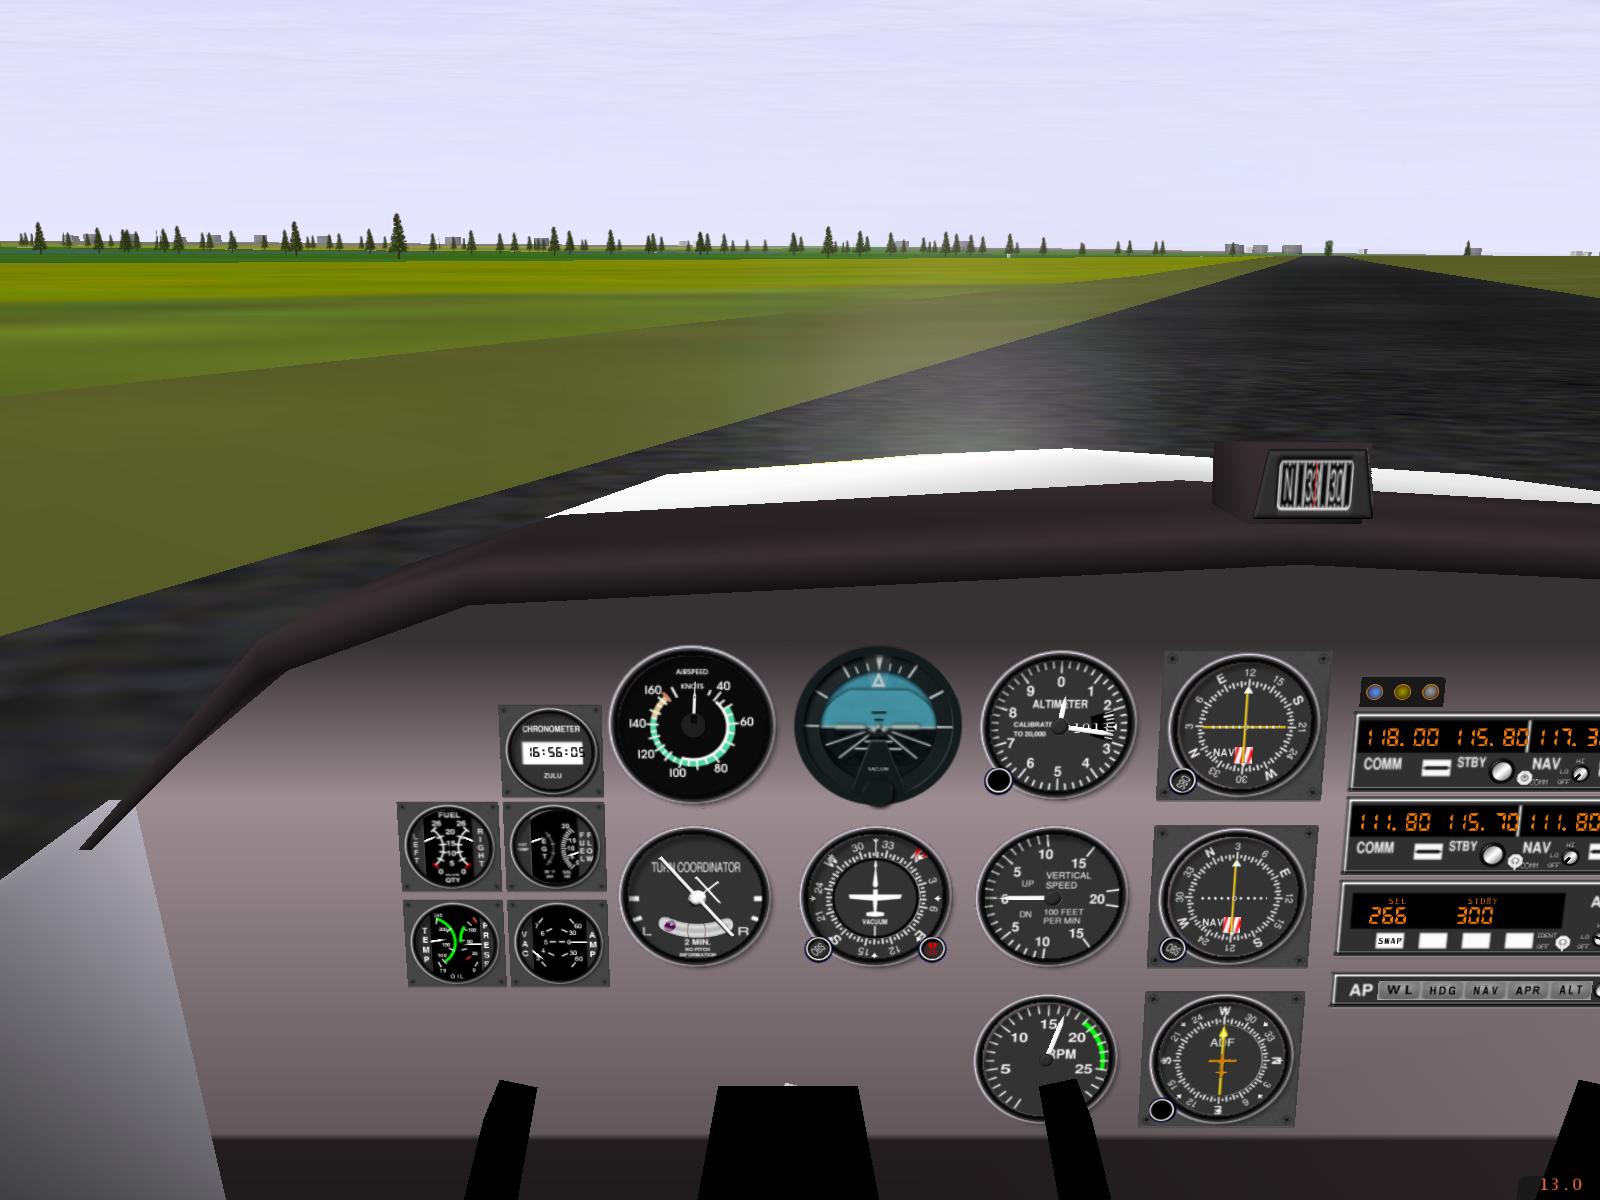
1. On the Threshold

The run-up and pre-takeoff checks are finished and tower has cleared us onto the runway. The plane's not moving yet, so all three wheels are solidly on the ground. Look closely at the vertical distance between the top of the white cowling and the horizon. Right now, the horizon is between a third and a half way up the windshield, just like it will be during level cruise on the downwind leg and during final approach with the flaps down.
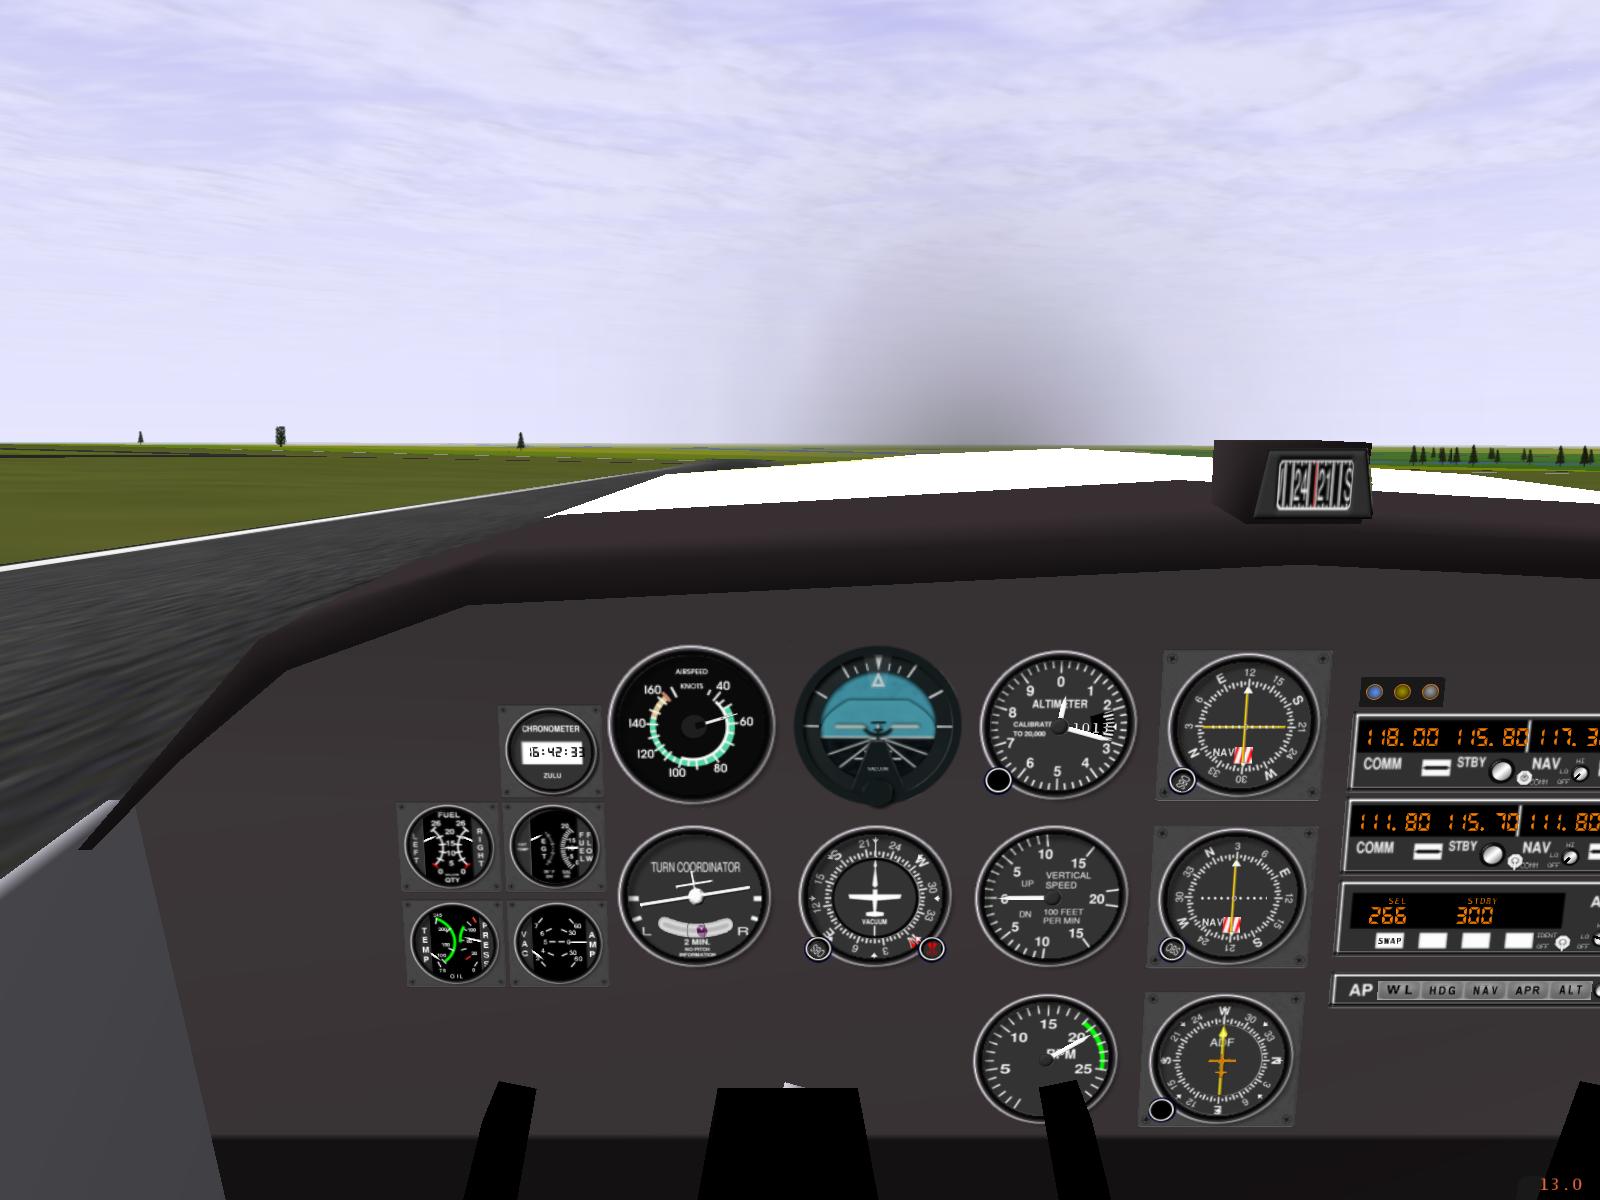
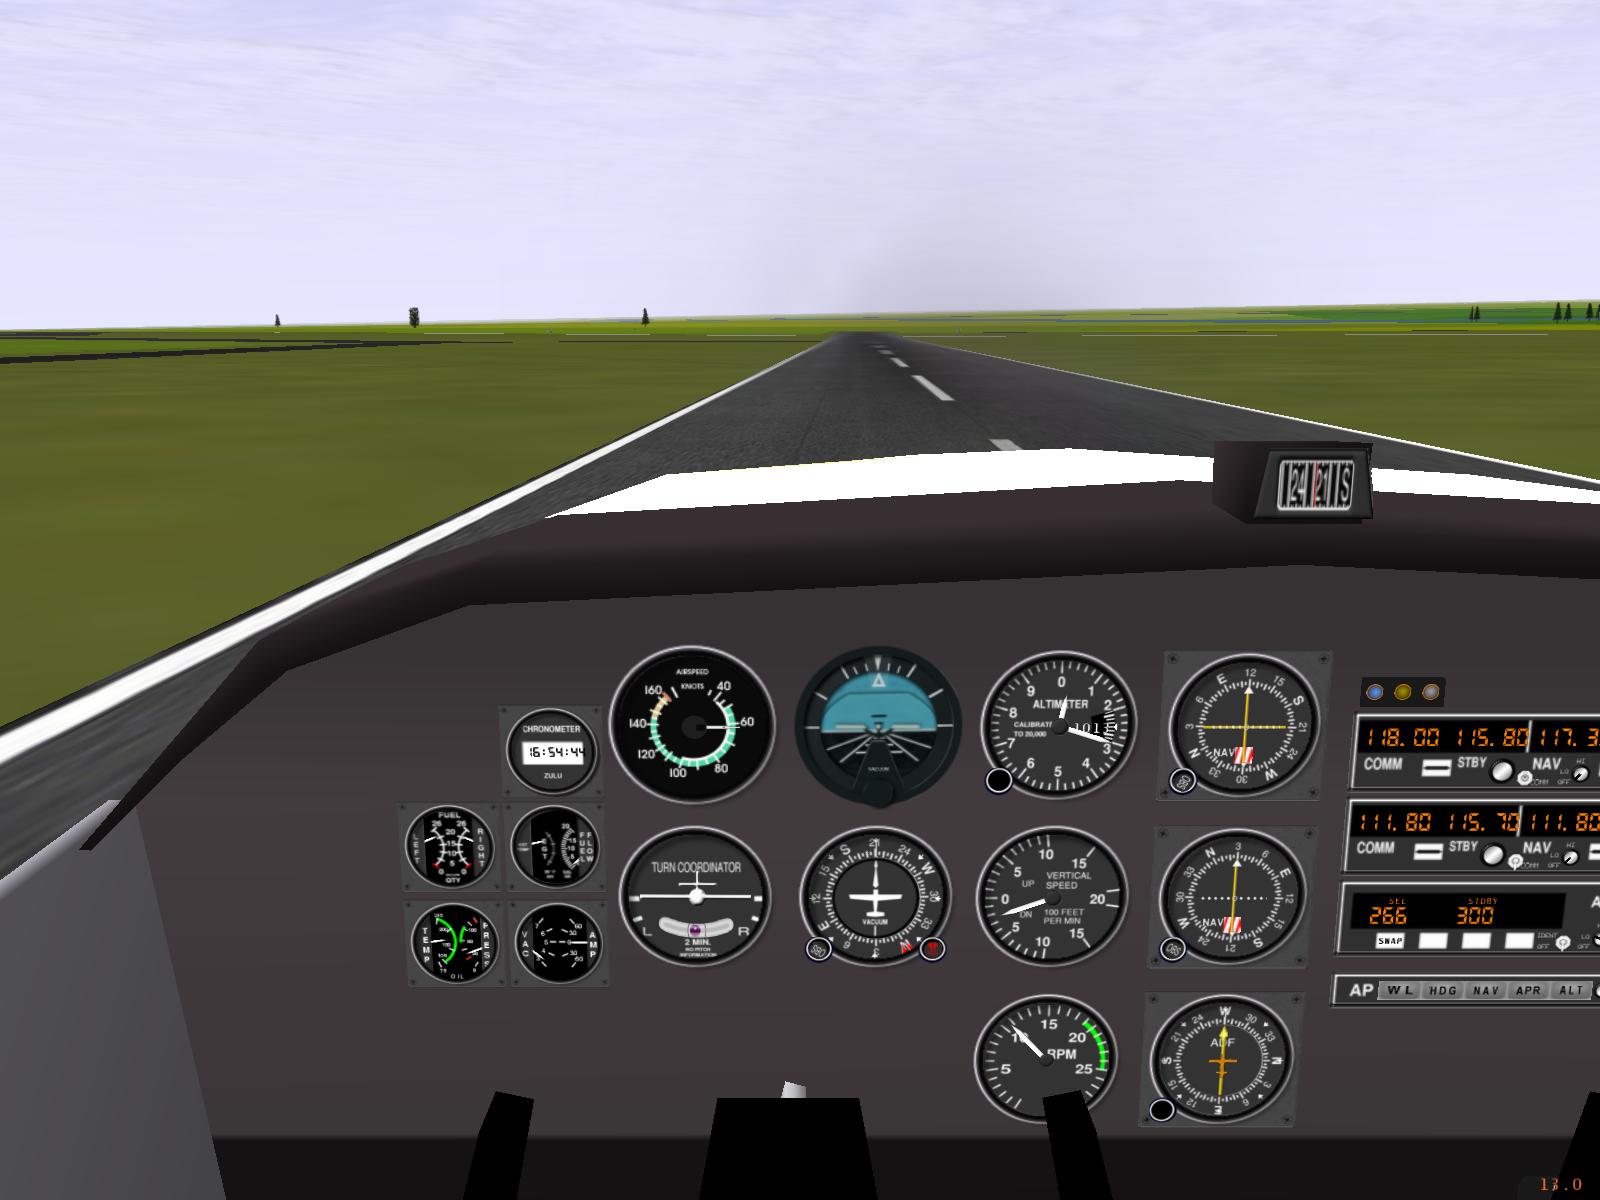
2. Beginning the Takeoff Roll
When I advance the throttle to full, the plane starts moving down the runway. The speed causes the nose to lift slightly on its own, but the horizon is still between a half and a third of the way up the windshield.
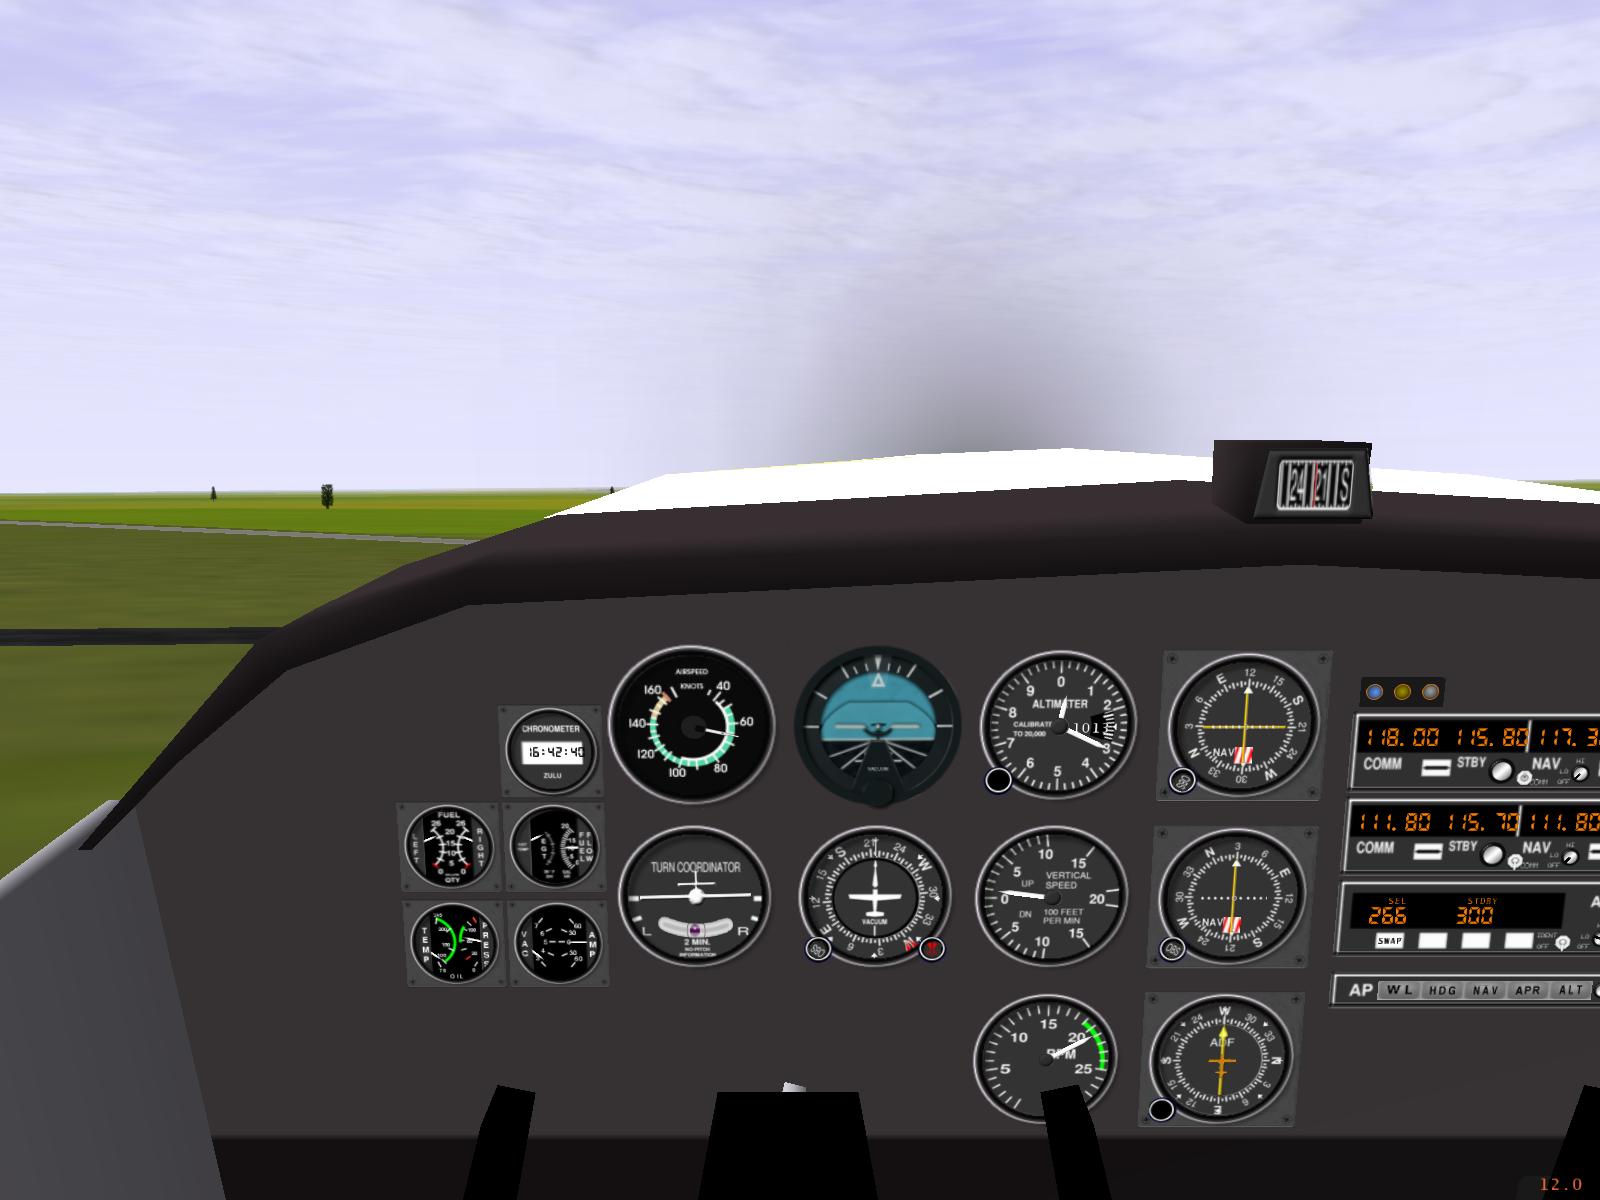
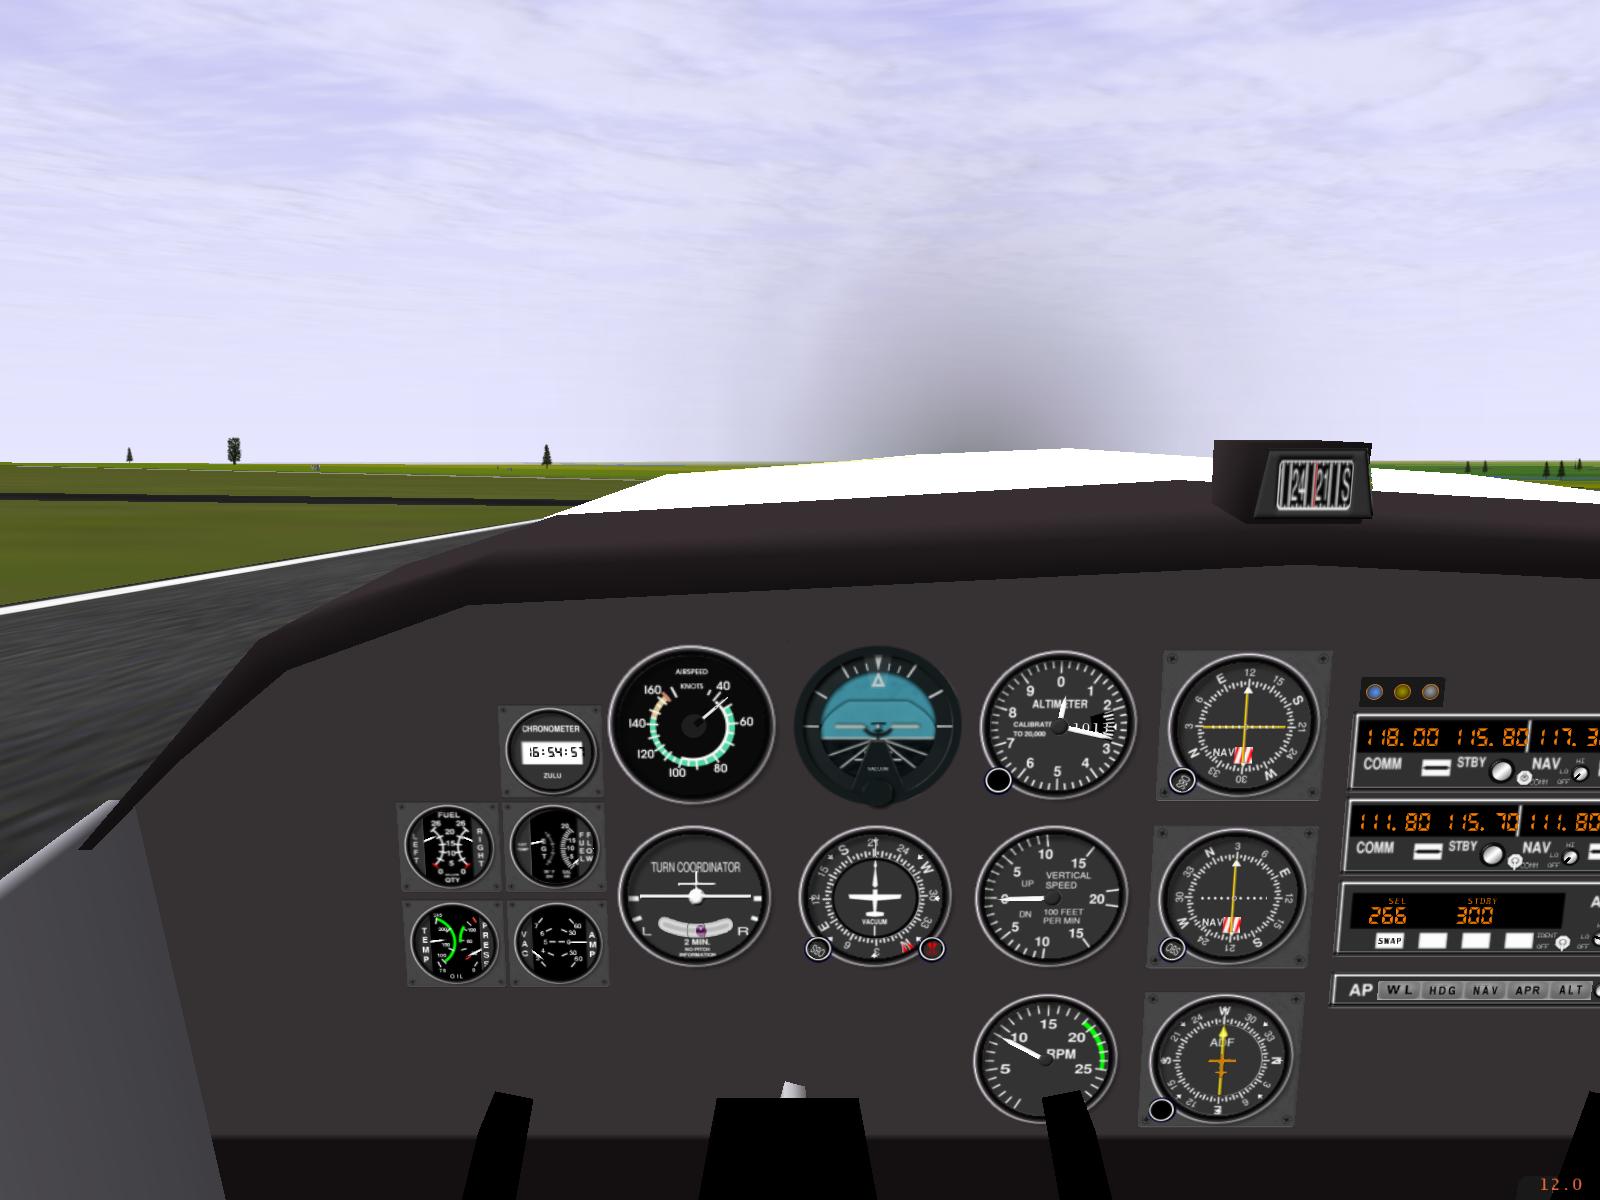
3. Raising the Nose
As the speed increases, I pull back just a little to take some weight off the nosewheel. At 55kt, the nose wheel has started to lift a little off the runway: you can tell, because the horizon is now touching the bottom of the windshield. I am almost in the climb attitude.
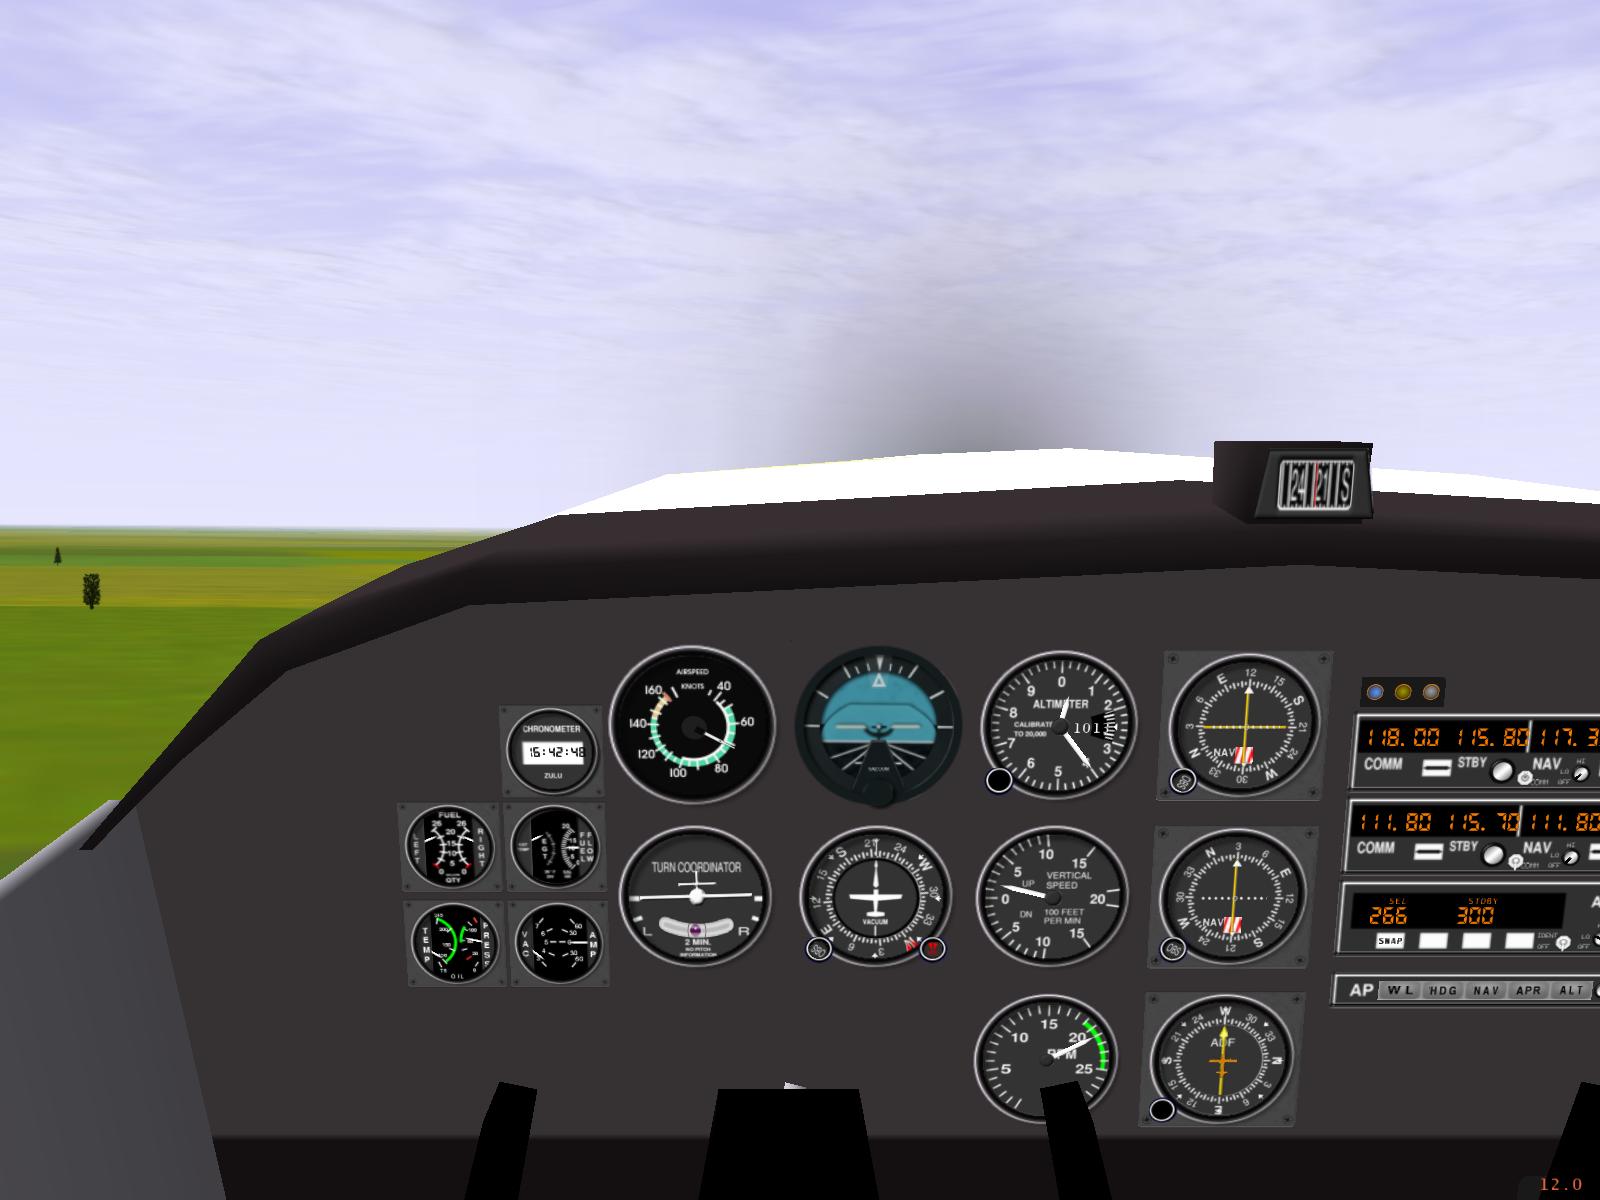
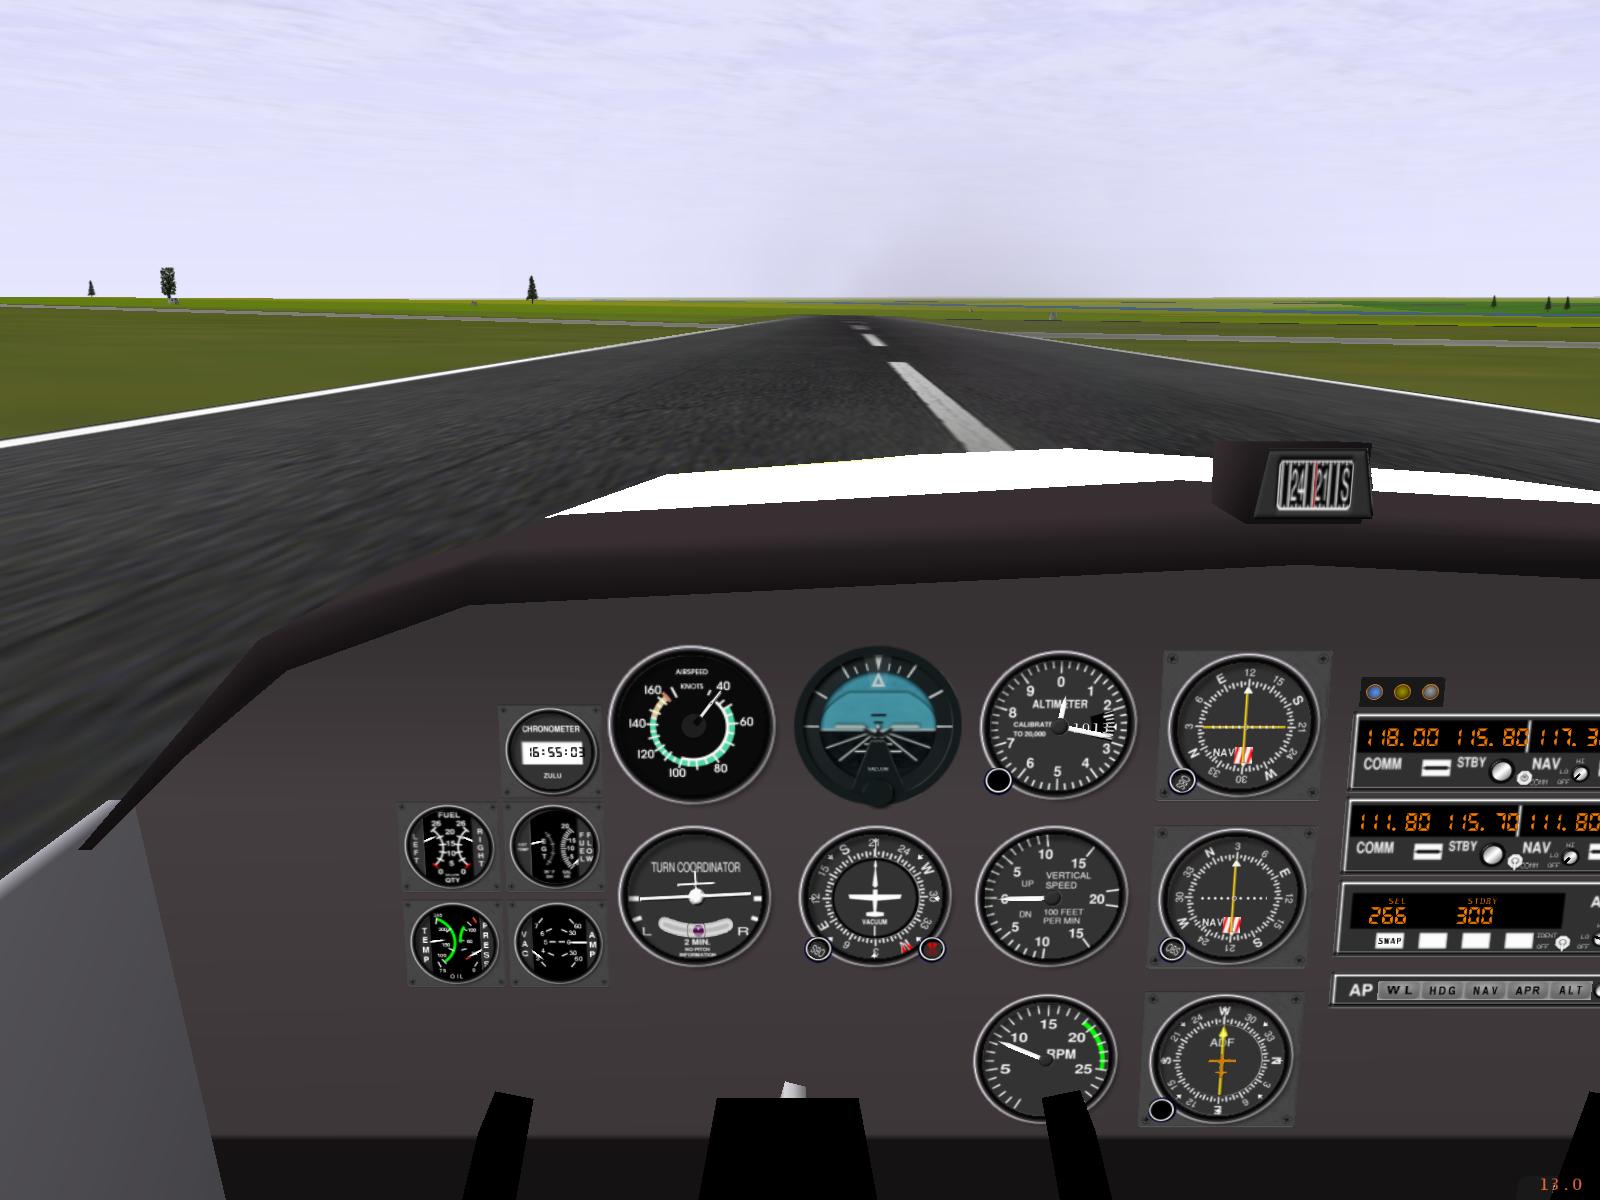
4. Liftoff
At 65kt, the other two wheels leave the runway and the plane is flying. Note that I do not yank it off by pulling the yoke way back: raising the nose only a tiny sliver above the horizon and holding it there is sufficient to get the plane into the air. Note where the horizon strikes the sides of the cowling, just above the top of the panel.
5. Climb Attitude
After I lift off, the plane keeps speeding up: in ground effect, there is no more friction from the tires but drag is very low. Since I want to climb at 70 kt, I have to raise the nose a sliver higher to keep the airspeed down. Now, at 100 ft AGL, my plane is in the climb attitude: all of the white cowling is now above the horizon, and the horizon hits the sides at very top of the panel itself. As long as I hold the horizon at this point, the plane will keep climbing smoothly at 70 kt.
At no point during this entire circuit will it be necessary to raise the nose any higher than it is right now: the climb attitude is the highest attitude I'll need to use for regular flight.
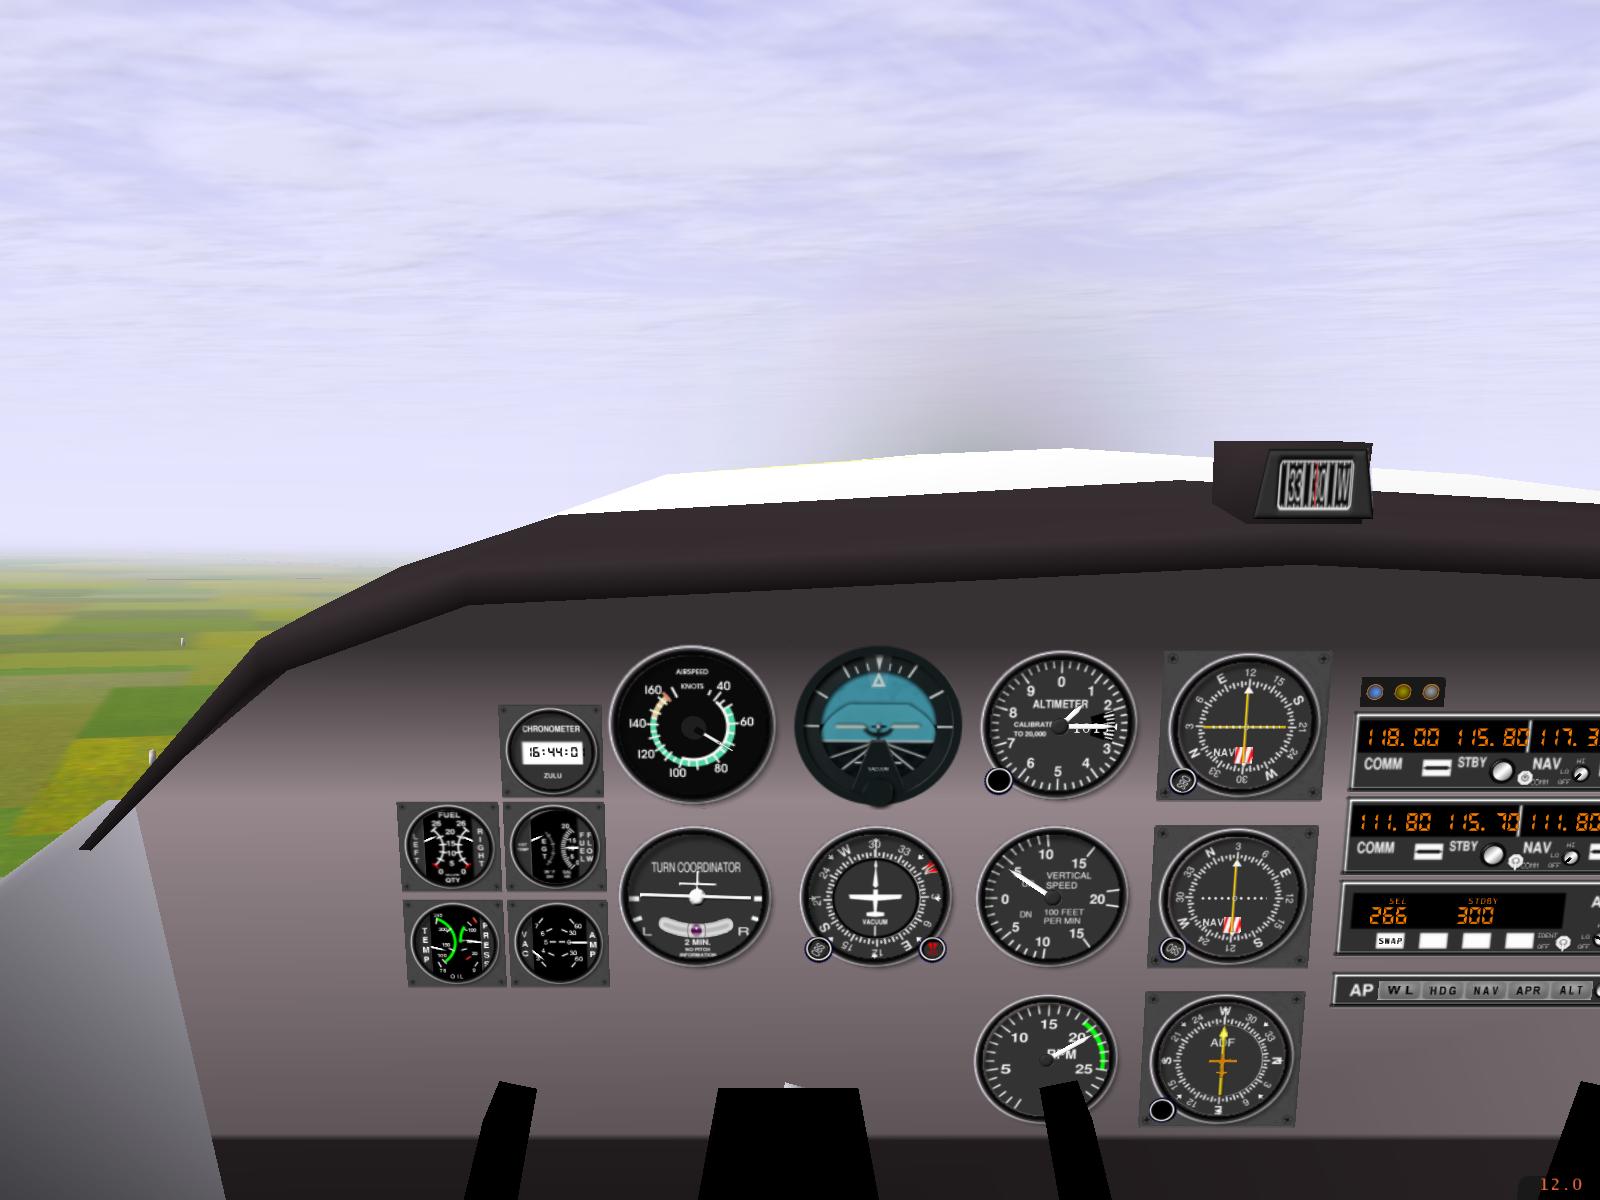
6. Turn to Crosswind

At 800 ft ASL (400 ft AGL in real life, 500 ft AGL in FlightGear), I start my turn to crosswind. Normally, the turn would be to the left, but runway 22 at CYOW uses a right-handed circuit to keep us out of the way of the big jets in the south field.
This is where things get a little trickier (but not much). Because I'm turning, the horizon is not going to hit the panel in the same place on both sides. Instead, I have to imagine where the horizon was hitting the centre of the panel out of side, and try to keep the imaginary hidden horizon going through that spot; to do so, I will have to pull back slightly on the yoke. It works, and the plane is still climbing at around 70 kt through the turn with 15 deg bank (steep turns are a dumb idea at slow speed near the ground).
Before making the actual turn, I looked out my window for two reasons: to check for traffic, and to choose a target point under my wing; as long as I turn and fly towards that point, I will have done a more-or-less 90deg turn.
7. Crosswind Leg
The turn to crosswind is finished and my plane is still in the climb attitude, on its way to a circuit altitude of 1500 ft ASL. Depending on the wind, the Cessna 172 can usually make circuit altitude just before the turn to downwind, but if not, I will just keep climbing through that turn as well.
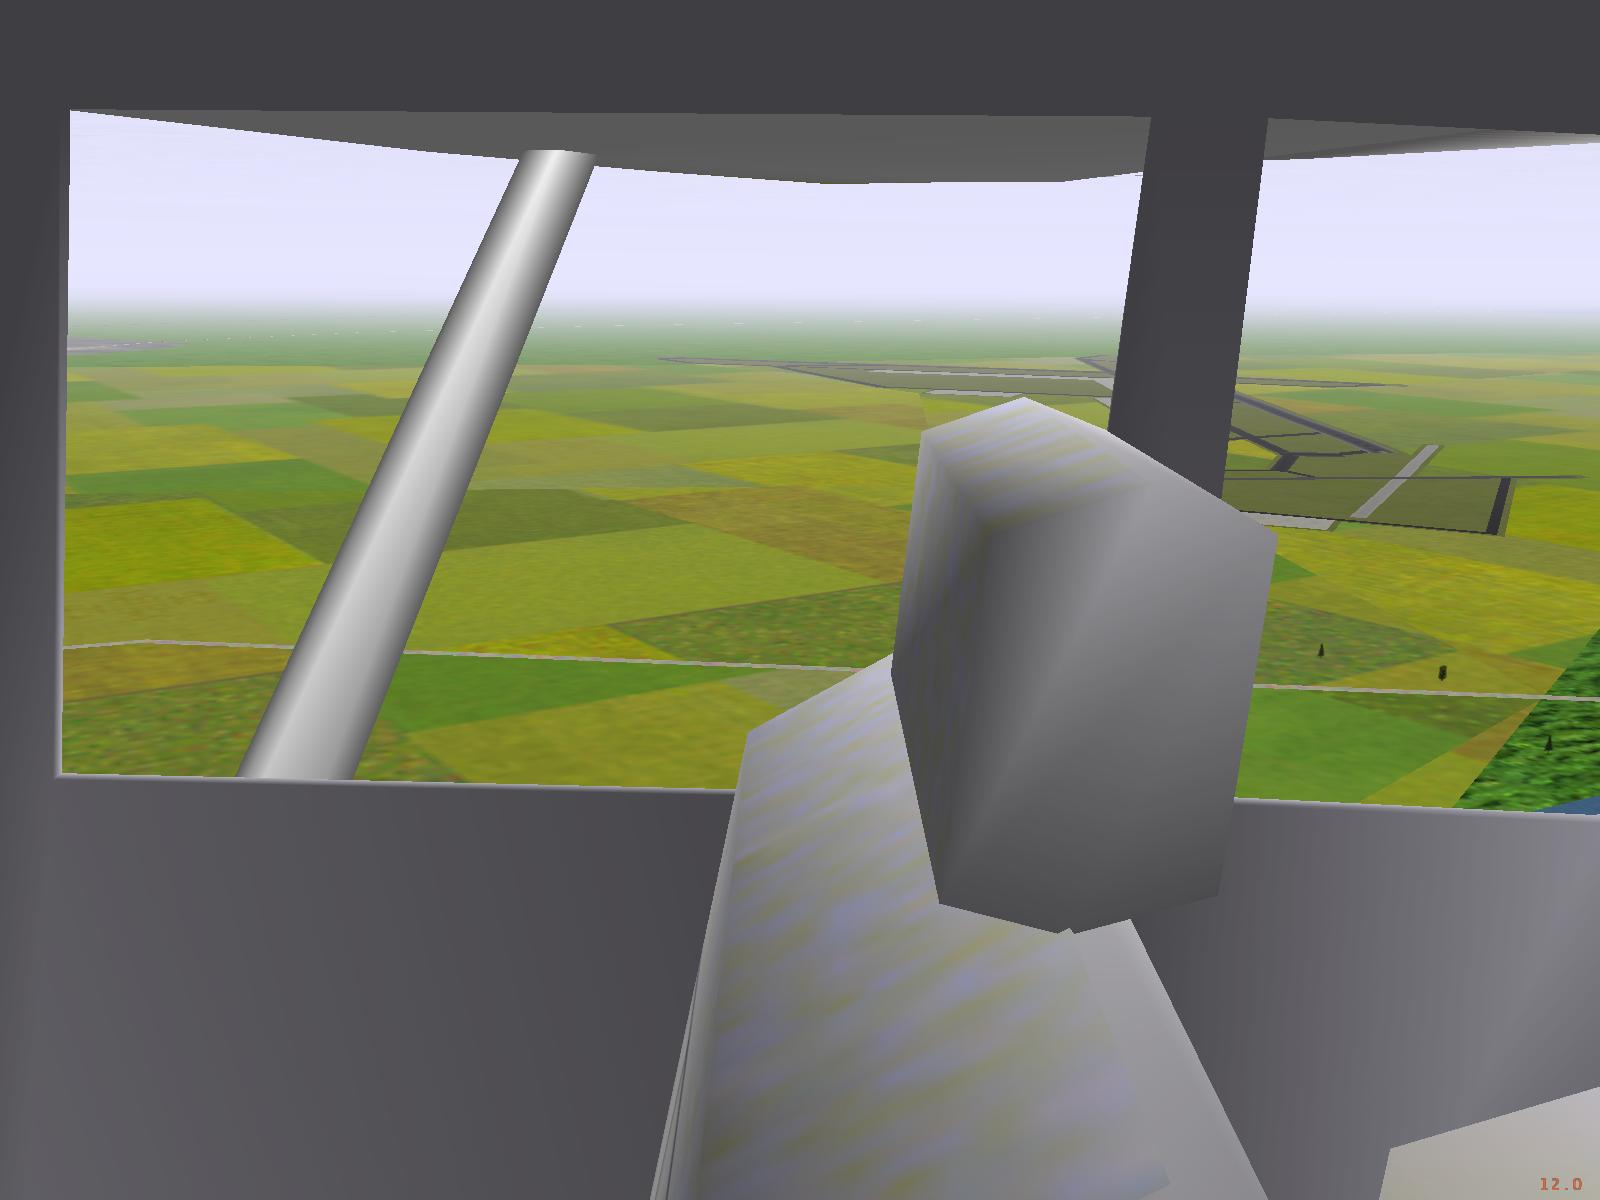
8. The Runway from Crosswind

As my plane climbs in the crosswind leg, I look back over my shoulder to check where I am relative to the runway. Normally, you should not need much distance before your crosswind turn, so the runway will still be fairly close to the plane.
9. Turn to Downwind
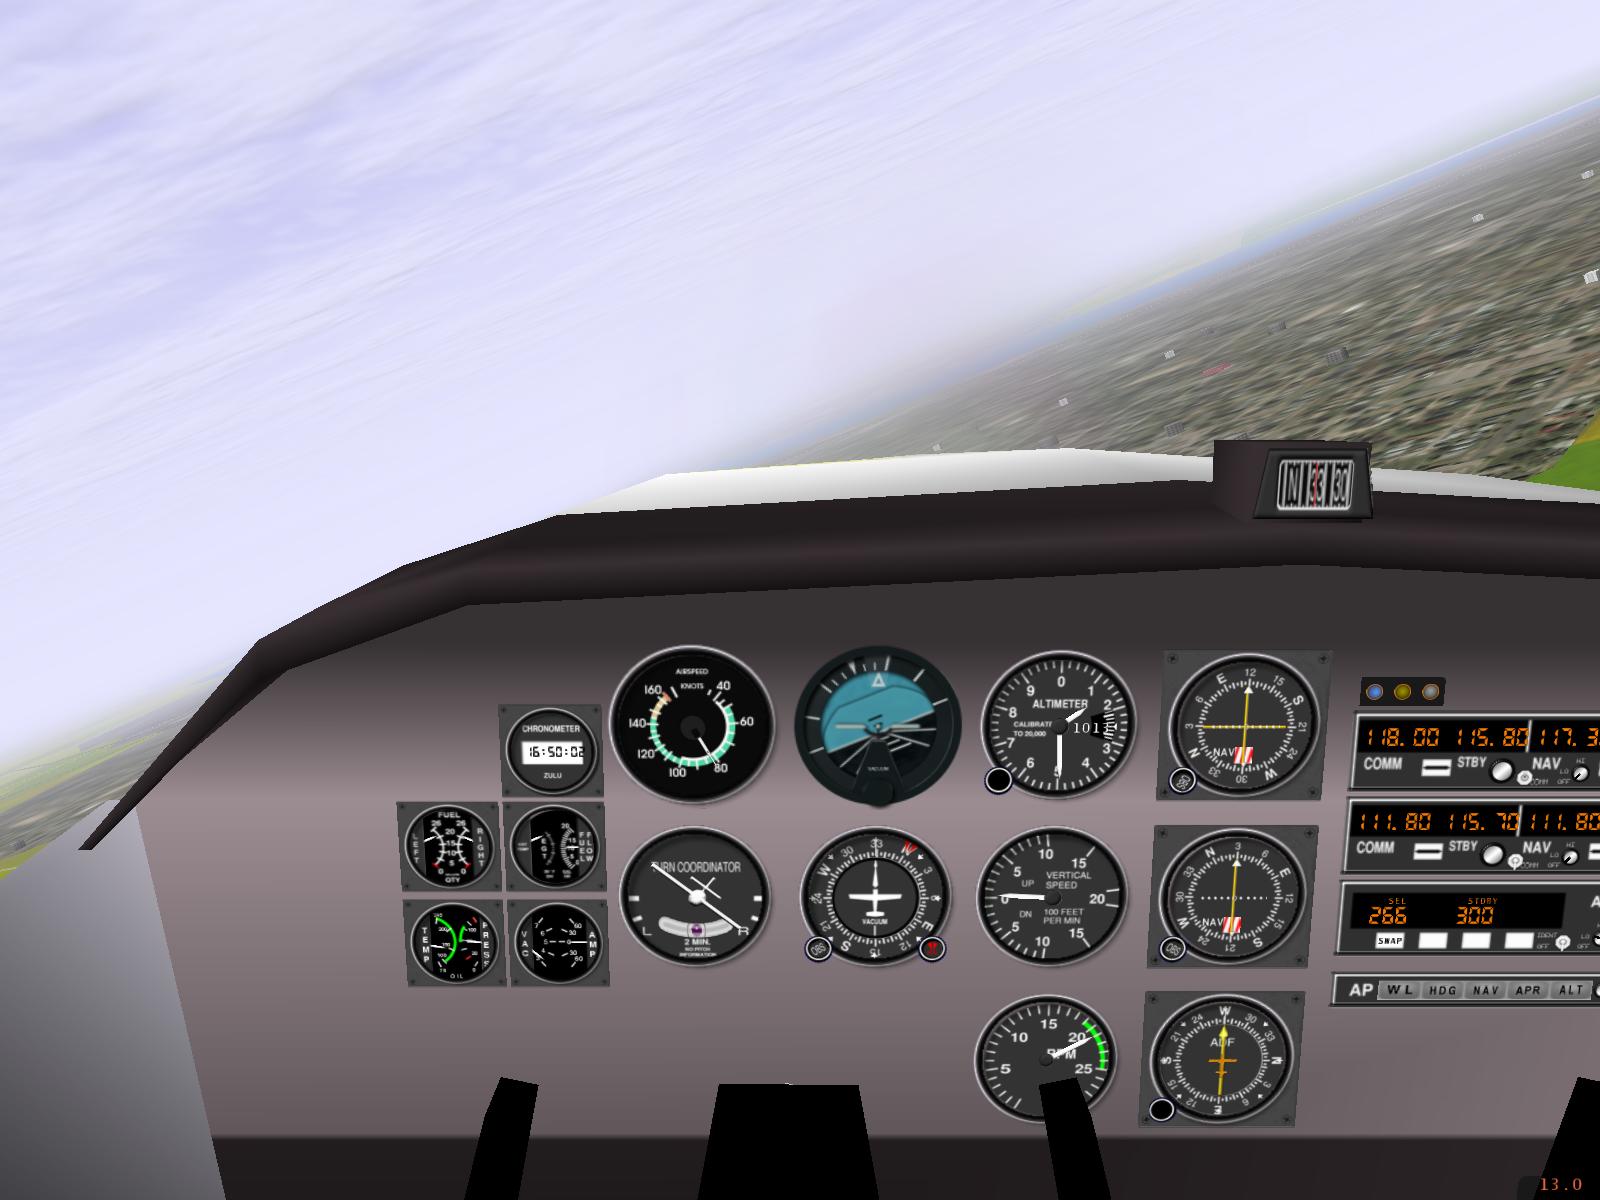
I'm almost a mile from the runway, and it's time to do the turn to downwind. Again, I pick a spot under my wing and then turn to fly towards it. Because I'm reaching circuit altitude at the same time as my turn, things are getting a little trickier:
-
I have to hold the plane in its bank, keeping the horizon and the correct angle across the windshield.
-
I have to push my nose down to the cruise attitude (see below), so that the plane doesn't climb past circuit altitude of 1500 ft ASL.
-
I have to pull back the power to a cruise setting once the plane has accelerated to between 90-100 kt.
At first, it might be a good idea to turn earlier or later so that you can separate the levelling-out from the turning, but it will all come together with practice. If you end up gaining or losing a couple of hundred feet, don't feel bad -- that happens at first in real life as well.
In any case, the rule for starting or ending a climb is APT: Attitude, Power, Trim. First I push the nose down to increase your airspeed, then I pull the power back to a cruise power setting, and finally I use the elevator trim to help hold the plane in your cruise attitude.
10. Downwind Leg

The downwind leg is often the longest part of the circuit. I have pulled the power back to 2100rpm and have put the nose into the cruise attitude, where the horizon is between a half and a third of the way up the windshield, just like it was when the plane was on the ground. I cross-check the altimeter to make sure that I'm not climbing or descending, then make tiny adjustments to my attitude if necessary, but I do not keep watching the altimeter while I'm doing that. It's surprisingly easy to hold altitude this way, once you get used to it.
As soon as I'm established on downwind, I make a radio call to tower and get my sequence for landing; I also tell them whether I plan to make a full stop (they'll assume a touch-and-go if I don't specify). Finally, I perform my downwind checks: fuel on both, mixture rich, carb heat hot (well, not in a C172R), mags on both, primer locked, brake pressure positive.
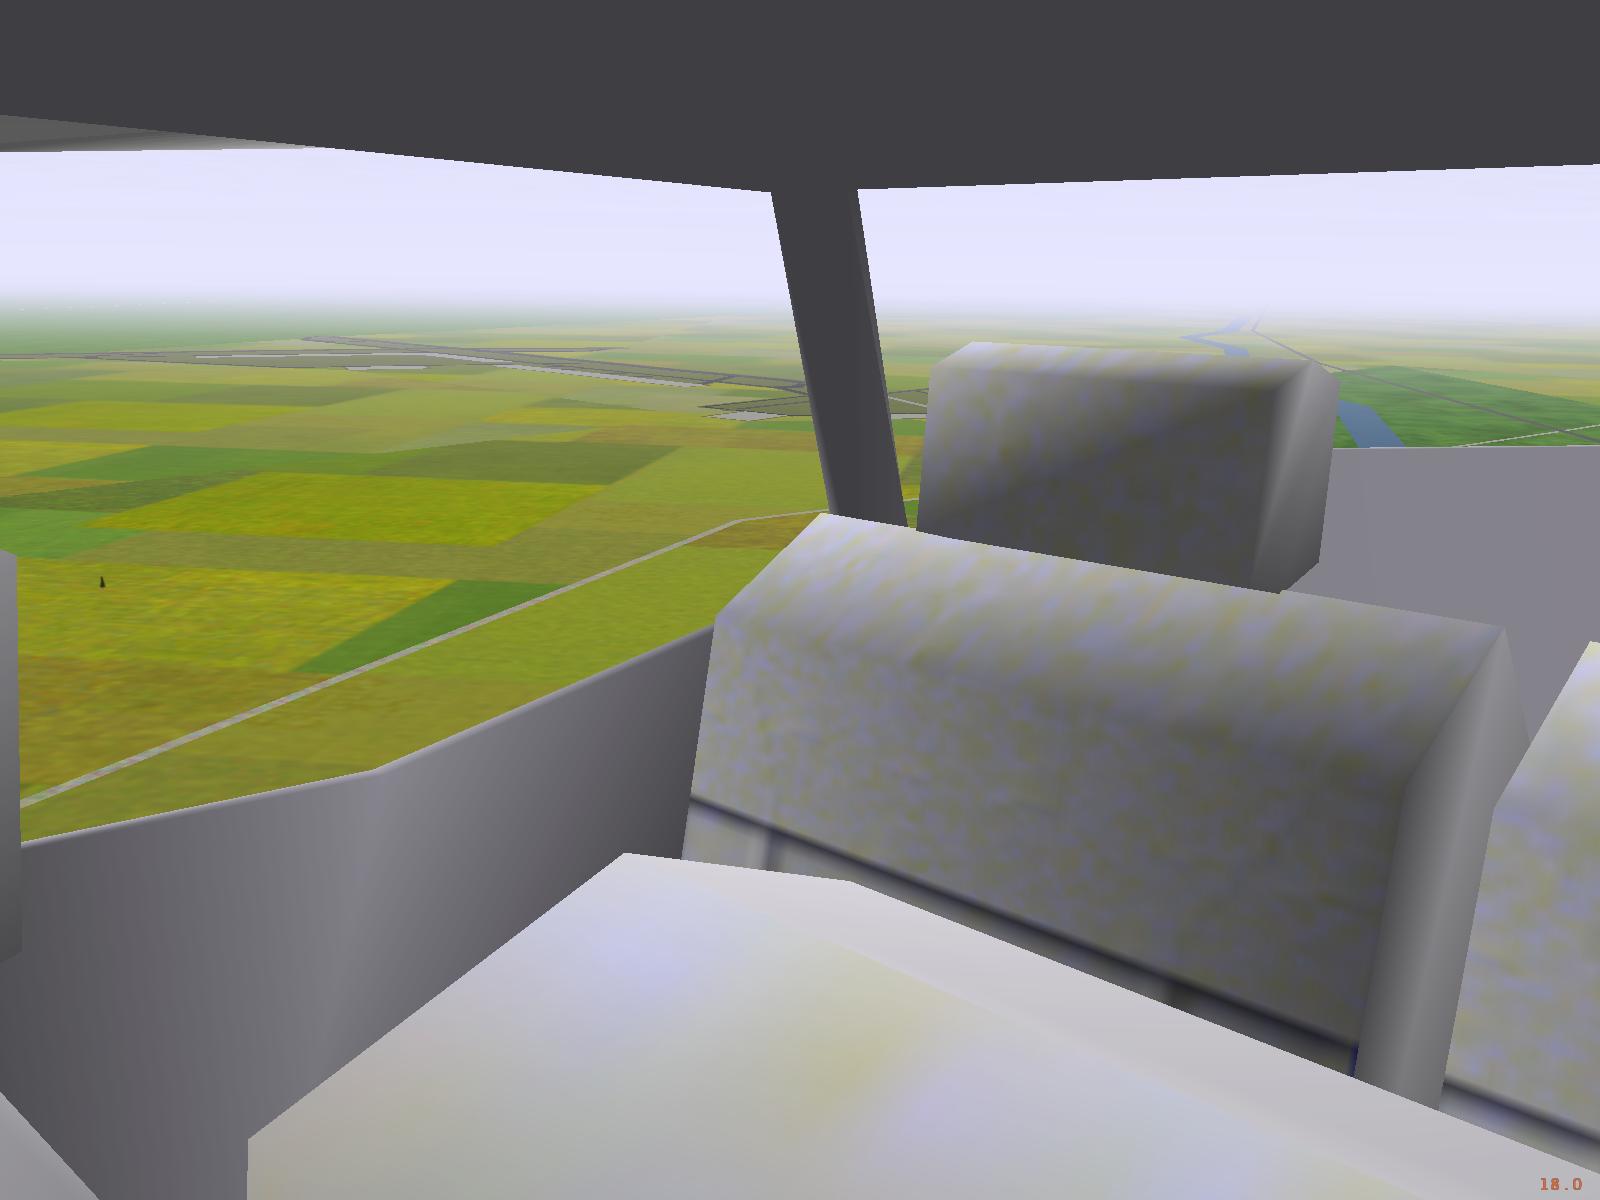
11. The Runway from Downwind
While I'm flying my downwind, I look out the side to check that I'm tracking parallel to the runway. In a strong crosswind, the heading of the plane will not be parallel to the runway, so I have to watch whether the runway seems to be getting nearer or farther rather than staying the same distance. During this flight, the winds are light and the runway position is fine.
12. Time to Turn Base
Most airports seem to have some convenient building or other feature right at the turn to base; unfortunately, that particular feature won't work at any other airport. Instead, I look over my shoulder and watch for when the threshold is about a 45 deg angle back from the plane (I could have turned a little earlier in this example). As soon as I reach that point, it's time to make a descending turn to the base leg; until then, I hold the 1500 ft circuit altitude (in the U.S., I believe that I could begin my descent while still in the downwind).
Alex Perry adds: I've been recommended to always pick a point ahead for my base turn, even at unfamiliar airports, and then crosscheck it with looking over my shoulder. The reason for this is it keeps the pilot spending more time looking forward and watching for conflicting traffic that is joining the pattern on a discouraged late downwind or base leg entry.
13. Turn to Base
This was the hardest part of the circuit for me to learn. In Canada, at least, we are not supposed to descend in the downwind, so we have to change the airspeed and power, add flaps, set up the descent, and execute a 90 degree turn all at the same time. To start or end a descent, I use the order PAT: Power, Attitude, Trim. This is where it's good to fly by the numbers: in a calm wind, a power setting of 1500 rpm usually works well for a 70 kt approach, so I take the following steps:
-
Reduce power to 1500 rpm.
-
Initiate a 10-20 deg turn (usually to the left, but in this circuit, to the right).
-
During the turn, pull up the nose until the airspeed is at 70 kt, then hold that attitude; usually, the attitude will be about half way between the cruise attitude and the climb attitude before I apply flaps.
-
Once the airspeed drops into the white arc, add the first 10 deg of flaps and adjust the attitude to maintain 70 kt (actually, the first 10 deg are allowed before the white arc).
If I do everything right, I come out of the turn onto the base leg right at 70 kt at a 400 fpm descent, and I can trim as soon as the wings are level.
14. Base Leg

Once I come out of the turn to base, I set the nose into the attitude that will give me exactly 70 kt (in this case, with the horizon about a quarter of the way up the windshield), then trim until I don't need any pressure to hold it there. There's not much else to do during base except to look for traffic and to try to judge when to start the turn to final. The plane is descending at about 300-400 fpm, but the VSI is not yet ready to register it.
15. The Runway from Base
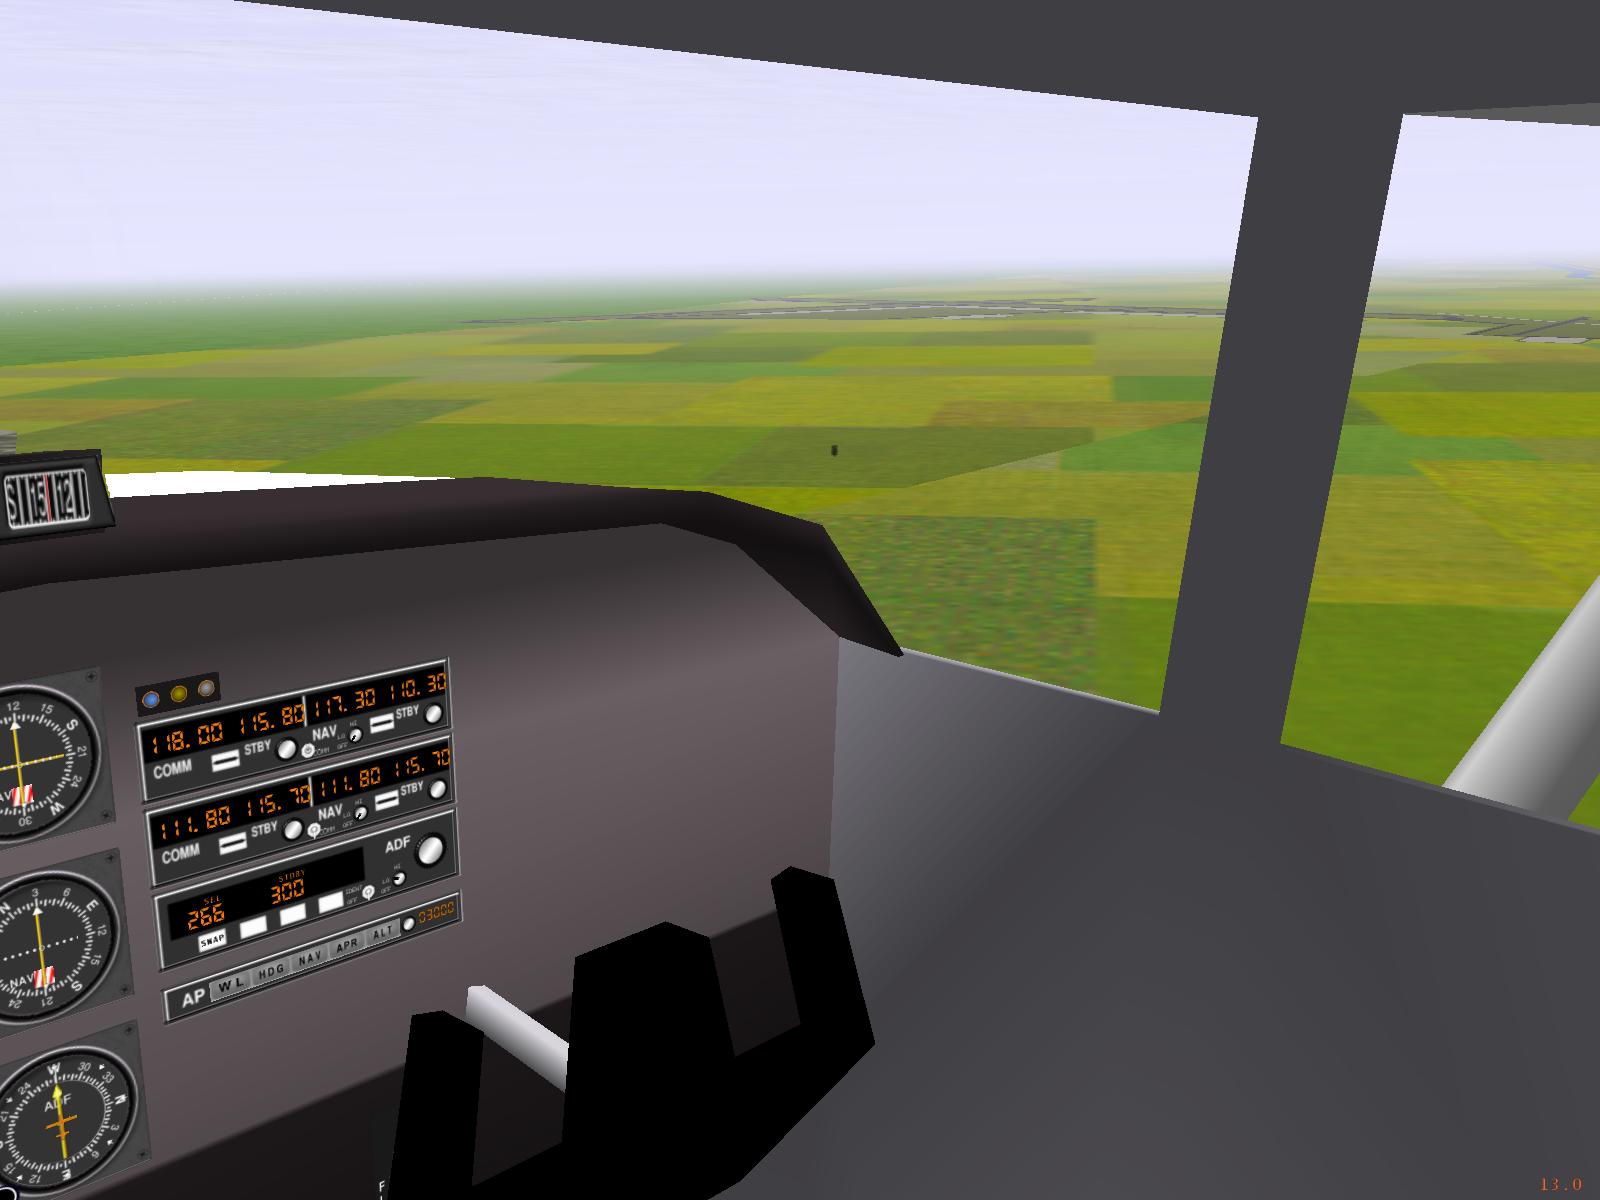
During the base leg, it's important to keep the runway in sight, but it's also important (in real life) to look the other way in case anyone else is coming in unannounced on a longer final. Given my current speed, this looks like just the right point to begin a gentle turn to final: it's a hard thing to estimate, and I still get it wrong often, but it's no big deal to do a gentle S-curve to realign myself if I turn a bit too late. The only big mistake would be to do a steep turn right now.
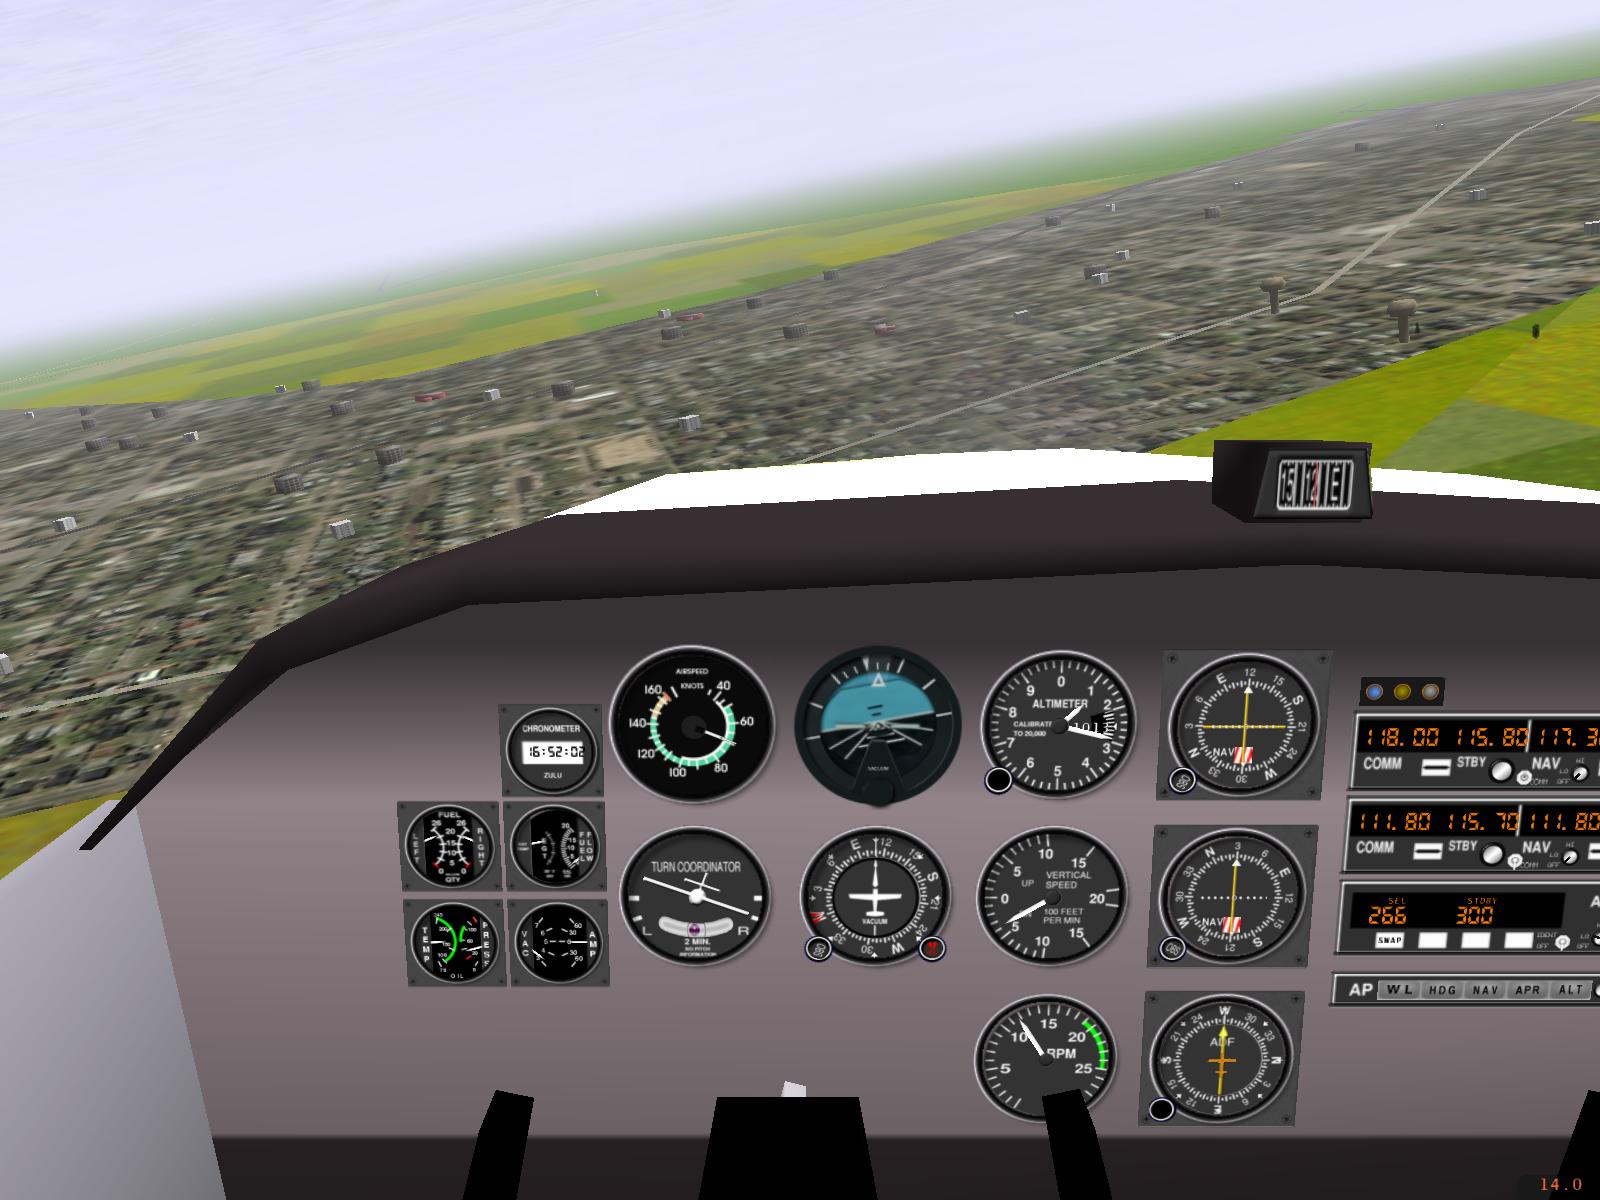
16. Turn to Final
I already trimmed for 70 kt on the turn to base, so this turn is nice and simple: I just have to pull back on the yoke slightly to keep the nose from dropping in the turn and raising the airspeed, and I want to try to turn right onto the extended centreline of the runway. A steep bank at this point would be a bad idea, since I'm slow and close to the ground, and have little room to recover from a stall/spin. I'm currently 630 ft above the real airport elevation, and 700 ft above the FlightGear elevation.
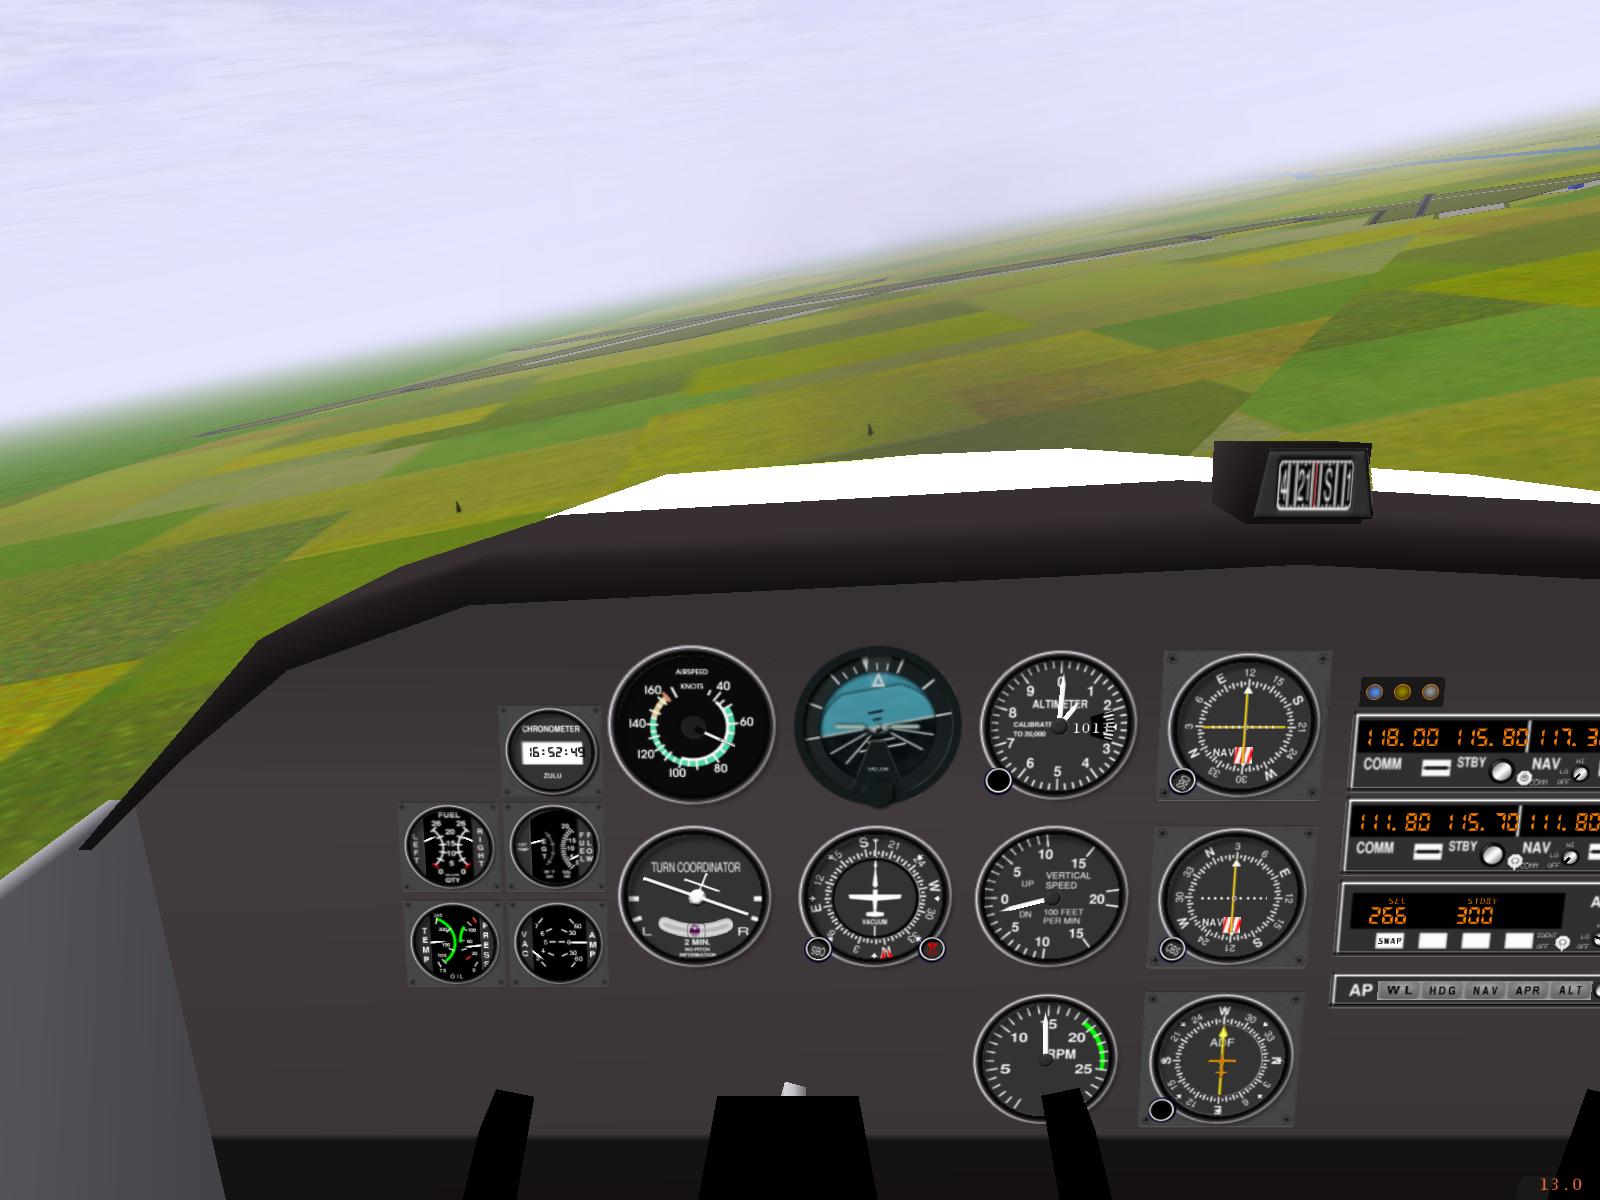
17. Long Final
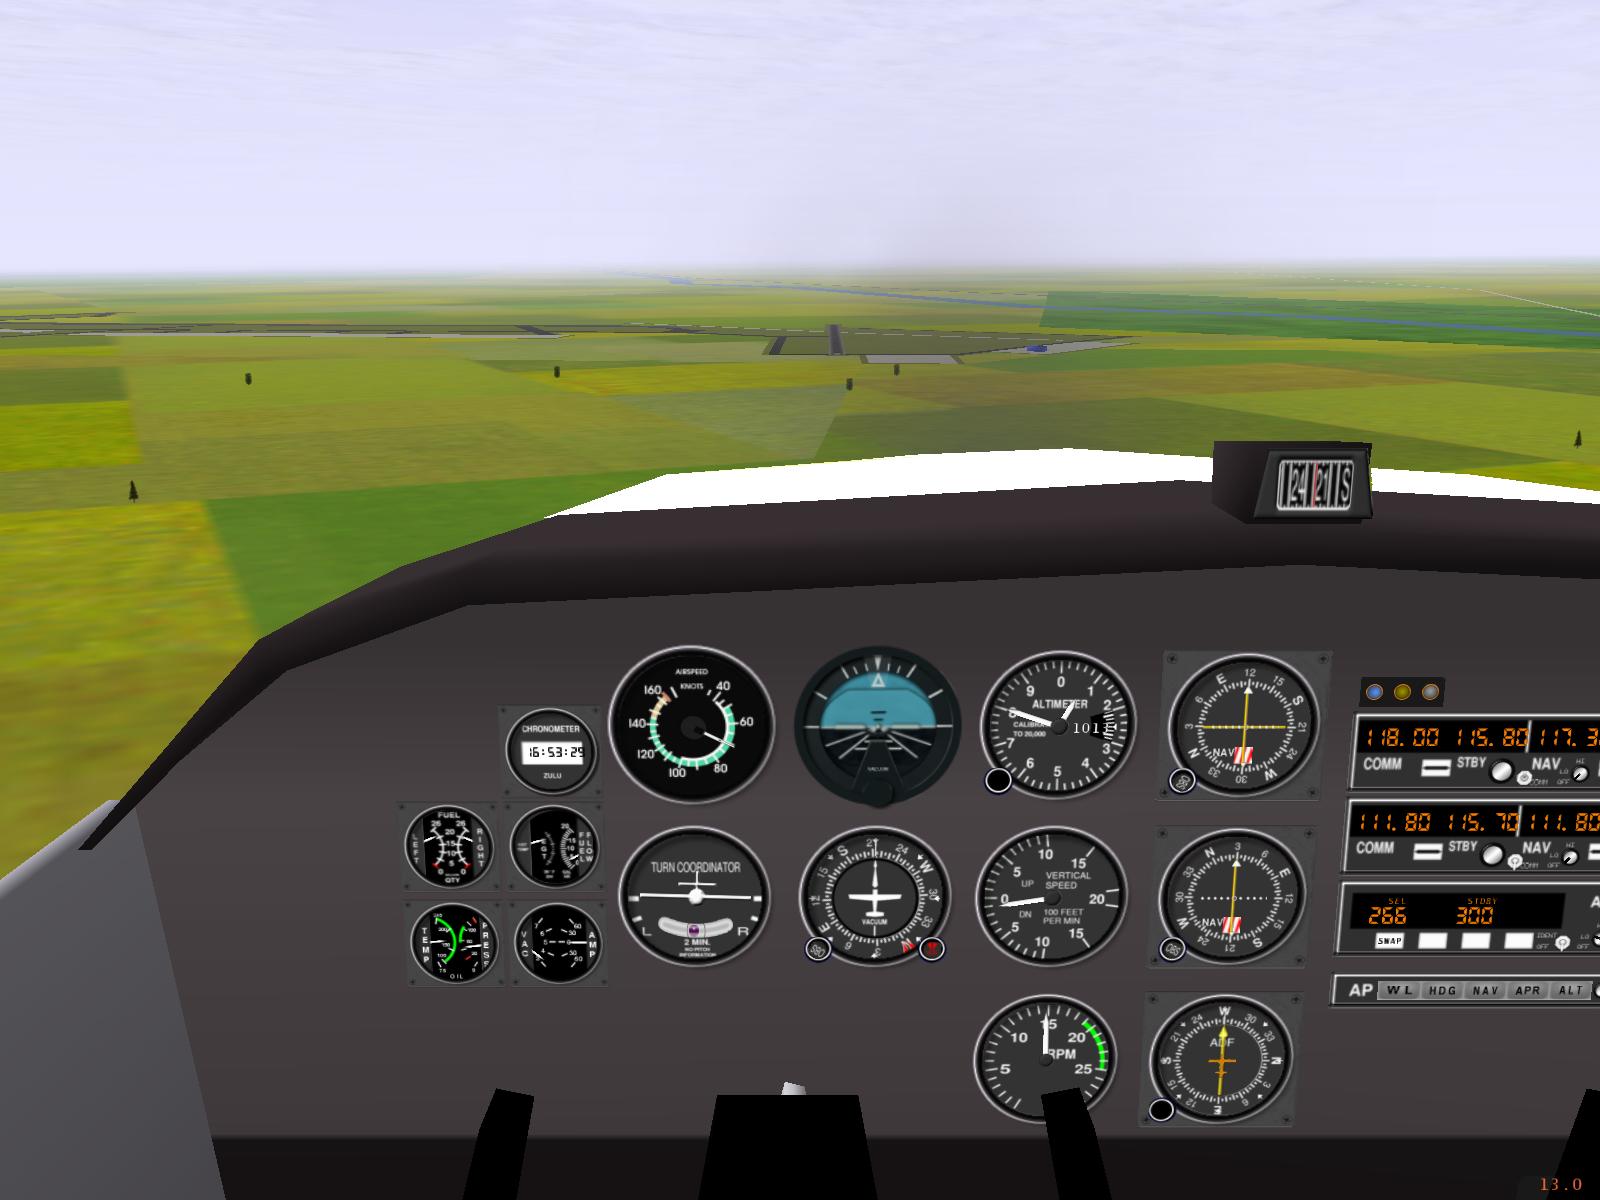
The airport is a little less than a mile ahead, and the plane is 500 ft AGL, so the approach looks good: 1500 rpm is bringing me down nicely, just as it does in a real 172 (if there were a strong headwind, I'd need a little more power). I really am descending faster than the VSI indicates -- it's very sluggish (and should be ignored on visual approaches); nevertheless, I drop another 10 deg of flaps to help the approach and push the nose down to maintain my airspeed. A good rule to remember is that at the same airspeed the nose is usually lower with flaps than without. With 20 degrees of flaps, my approach attitude is almost identical to my cruise attitude earlier; only the power setting is different.
Now comes the important part. I pick a point on the runway about a quarter of the way down (I'd use the threshold if this were a touch-and-go, since the 172 glides so well), then I try to hold that point exactly a third of the way up the windshield while maintaining my 70 kt approach speed. I retrim because of the flaps, then use small power adjustments rather than elevator to keep me on the glide path and hold the aim point steady on the windshield. As long as I hold this current attitude most of the way to the flare, my airspeed will stay steady.
It is also important to keep the plane over the extended centreline of the runway. Right now, it is lined up with the left edge; I can tell because the left edge of the runway looks perfectly vertical, while the right edge slows down to the right. When I am on the centreline, the edges will appear to slope downwards in opposite directions.
18. Approach

Still on final, about 300 ft AGL, I am in a good position. My aim point is still on the same spot on the windshield, and I'm still near my target approach speed of 70 kt (far enough above stall speed that the plane won't stall if a gust of wind temporarily slows its airspeed). I know that I'm over the extended centerline now, because the edges of the runway seem to open in opposite directions: one angles to my left and one to my right. I drop my last 10 deg of flaps; the flaps will cause the nose to rise and my airspeed to fall, so at the same time, I hold the nose down to keep my aim point at the same spot on the windshield and maintain 70 kt.
If FlightGear had ATC, the tower would call me about now with my landing clearance. If I didn't get it, I would have to overshoot and do the circuit again.
19. Short Final
I'm on short final, about 100 ft AGL, with the aim point on the same spot on the windshield: because I am still using the approach attitude and power setting, my airspeed is still 70 kt. It's obvious that I'm going to make the runway, so it's time to start pulling up the nose, very slowly, to get ready for the flare (in the U.S., this is called the roundout). My goal is to have the nose a little above the cruise attitude by the time the plane is a foot or two above the runway.
20. Beginning of Flare
It's very important not to fly the plane straight onto the runway or it will bounce. I already started raising the nose on short final and managed to reduce my speed from 70 kt to 62 kt. Right now, as I start skimming a foot above the runway, the plane is just a little above the cruise attitude. I'll try to keep the plane at exactly this level as long as I can, gradually pulling the nose up to the climb attitude as the airspeed falls.
21. Gliding in Ground Effect

Now it's time to burn off some speed. The wheels are a little more than a foot above the runway, but ground effect lets us stay in the air for quite a while. Keeping the plane off the runway requires a higher and higher attitude as the airspeed drops, but don't overdo it: note that here, at 53 kt, we're about halfway between the cruise attitude where we started the flare and the climb attitude where we'll end it. Fast but small control inputs should keep the plane under your control. If there were a strong crosswind, you would also have to be careful to hold your sideslip.
22. Touchdown on Main Wheels
I started the flare at the cruise attitude; now, with the wheels a few inches above the ground, the plane is just about at the climb attitude. At 45 kt, we're still a little fast touching down, but it's not too bad (and we will lose a couple more knots by touchdown). As soon as the wheels touch (or just before, if I'm gliding too far), I retract the flaps to help keep the wheels more firmly on the runway.
Note that the attitude is very important at the touchdown. If you put the nose too low, the nosewheel will hit first and all kinds of bad things will happen. If you raise the nose too high, you may balloon ten feet up into the air then drop like a stone when the wings stall. Make sure that you choose the attitude rather than letting the plane choose it for you.
23. Lowering the Nosewheel
As my speed falls below 40 kt, I gently lower the nosewheel to the ground. If I do it too soon, the nosewheel will shimmy; if I do it too late, it will drop hard when my speed falls low enough. On a short field or in strong, gusty winds, however, I lower the nosewheel quickly and firmly to keep the plane under control on the ground.
Even after lowering the nosewheel, it's a good idea to keep some back pressure on the yoke so that most of the weight will be on the main wheels, both to spare the nosewheel and to make the brakes more effective. Once the nosewheel is down, I apply the brakes gently (there's no rush -- the turn-off is still a fair way ahead).
If FlightGear had ATC, the tower would call me about now and tell me to exit on taxiway Papa then contact ground at 121.9 MHz.
24. Exiting on Taxiway Papa
Once I'm clear of the runway, I stop on taxiway Papa to do my post-landing checks. If FlightGear had ATC, I would then call ground on 121.9 MHZ and request permission to taxi back to the flying club. I usually taxi a 172 at around 900-1000 rpm, less if there are strong, gusty winds.
Google Advertisements - Click to support FlightGear
Latest Version
v2.0.0 - 18 Feb 2010
A new major update of the FligtGear simulator. Please check the readme
Notam

Would all pilots try and avoid mpserver02 as its often overloaded.